How to Look Well-Rested with Brighter and Wider Eyes!

Do you have dark circles, puffy eyes or just a sleepy looking appearance after repeatedly hitting snooze on your seven alarms? Because same. I developed a routine to de-puff and give a highlighted, lifted appearance to my under eye area, while also brightening and widening my eyes! Keep reading to see the list of products I use and the ways I apply them to look more awake!

I always wake up with puffy eyes and the Clinique “Pep-Start” Eye Cream is my go-to for hydrating and brightening! I love it for so many reasons. I’ve struggled with finding the perfect formula to lightly moisturize my under eyes before I apply concealer. Whenever eye creams are too heavy, it will cause whatever you put on top of it to look heavy and crease. This one is so lightweight, while also being hydrating, so it’s the perfect formula for A.M. application! It is cooling to the touch, which helps with de-puffing as well! I’ve also noticed that this doesn’t give me those small white bumps, which sometimes can happen with different eye creams that I’ve tried. I use a small, pea sized amount and tap it on with my ring finger since it applies the lightest amount of pressure! I wait about a minute for it to sink in and then I go onto the next step!

I’ve been using the Becca “Under Eye Brightening Corrector” for a couple years now and I can’t imagine this product not being in my daily routine! If you have stubborn dark circles that show through with even the most full coverage concealers, then you need to invest in a good corrector! This one is a peach color with light reflecting illuminators, which will counteract the blue tones in your dark circles. A little goes a long way with this product, plus it lasts all day long! I apply this with my damp beautyblender underneath my eye and in the inner corners.

After I’ve moisturized and corrected, I apply a full coverage concealer! I always purchase one that’s 1-2 shades lighter than my foundation to give a highlighted effect! My holy grail formula is the Tarte “Double Duty Beauty Shape Tape Contour Concealer” (that’s a mouthful!) and it comes in 14 shades so you’re bound to find your perfect match! It is by far the most lightweight, full coverage formula that I’ve ever tried! It truly conceals acne, dark circles and redness so flawlessly! I always use this product with a damp beautyblender to help sheer it out slightly! If you’ve struggled with your concealer wearing off, then you NEED to try this one because it doesn’t fade during the day or look drying!

By this point, I’ve used so many creamy, liquid products underneath my eyes, that I have to set it with a powder to lock it all in and prevent any creasing! I always choose a yellow-toned, matte highlight powder to enhance the brightening effect I’m going for! Even if you have a different skin tone than me, I would still highly suggest checking out the NYX “Highlight Pro Singles” on Ulta.com! These aren’t sold in store, but I always stock up online! At only $5 a pan, they’re extremely affordable and there are 12 different shades to choose from. I was constantly buying the Anastasia highlight refills and then I discovered these, which are just as pigmented! The powder will also help smooth out any fine lines you may have, which is an added bonus!

Now that my under eyes are concealed and bright, I move onto making my eyes look big and awake! On a daily basis, I typically just apply my bronzer in my crease and take a shimmery shade all over the lid. Even when I’m rushing, I will never forget to highlight my inner corners with a shimmery, champagne eyeshadow! This makes the biggest difference in opening up your eyes and reflecting much needed light in an otherwise shadowy area! I love using this L’Oreal “Infallible Eyeshadow” in “Iced Latte” to brighten everything up! I take my pinky finger and dab the shadow on my inner corners, blending it outwards to seamlessly fade into my lid color.

I have round eyes, with a lot of lid space, so I always use eyeliner on the top lash line to help define and thicken the look of my eyelashes! Whenever I don’t put eyeliner in this area, I feel like my eyes look super tiny and tired. My favorite liners to use are the Kat Von D “Tattoo Liner” in “Trooper” for an ultra black, winged liner and I love the Marc Jacobs “Highliner Matte Gel Eye Crayon Eyeliner” in “(Earth)quake 41” for a smudged out, brown liner look! I also use the Marc Jacobs liner on my top waterline to further define that area, as well as smudged out on the outer corners of my lower lash line!

I’m pretty sure the best makeup secret to opening up your eyes and making you look awake is using a nude eyeliner in your lower waterline! The Tarte “Fake Awake Eye Highlight” is the most pigmented and long wearing one I’ve tried so far! I’ve repurchased it so many times because nothing compares! The nude color will neutralize any redness you have from having your eyes closed all night long. Using a light color in the lower waterline will help widen and brighten your eye. Back in the day, I would use a white eyeliner, but I’ve started to enjoy the more natural effect of a nude eyeliner now! If you haven’t tried this beauty hack yet, you really need to! It makes the biggest difference and I really can’t do my makeup without it!

Do you have any tips or tricks to getting a fresh and well-rested appearance when you’re really just a sleepy gal?! Let me know by leaving me a comment! I love learning new techniques from you guys! Thank you so much for reading, I hope you found this type of product review/routine helpful!

Follow me on Instagram: @abigaillindsayblog

Email any business inquires to:

abigaillindsayblog@gmail.com

Favorite Fall Nail Polishes!

I love Fall makeup and fashion, so it’s really no surprise that I’m equally obsessed with seasonal nail polish shades as well! I wanted to do a post on my favorite colors for the Autumn months! I try my best to coordinate the clothes that I wear to my nail polish and these all seem to match my wardrobe perfectly!

All of these polishes are the “OPI Infinite Shine” formula, which is a hands down, holy grail product for me. It will not chip, flake or fade. It lasts for one week, sometimes even two! I’m a huge fan of gel manicures, but it can get costly and the excessive time spent at the nail salon every other week makes me twitch. This is by far the best regular polish formula that I’ve found and I usually buy mine from Ulta, when they have the buy two, get one free deal going on! I’m going to list them out and try to explain the color to you, so don’t judge me on the descriptions!

Reach for the Sky– Creamy, Blue-Gray

Taupe-less Beach – Cool-toned, Neutral Taupe-Gray

You Don’t Know Jacques– Dark Taupe with Mauve-Brown undertones

Miami Beet – Violet-Red Berry

Dulce de Leche – Brown-Nude with Peach undertones

Malaga Wine – Rich Warm Red

You Sustain Me – Violet-Mauve Cream

Linger Over Wine – Warm, Brown-Mauve

I’m really looking forward to doing more Fall-themed blog posts! I have some good ideas, but I would really love to know what you would like to see! Getting your feedback is so important to me and I love reading the comments! I feel so inspired by your new ideas and suggestions, so definitely let me know!

Follow me on Instagram: @abigaillindsayblog

Email any business inquires to:

abigaillindsayblog@gmail.com

August Favorites!

Too Faced, Matte Chocolate Chip Palette, $26.

I have been loving matte eyeshadows for my quick and easy, every day makeup routine. This little palette has all of the shades you could possibly need for a simple look! There are 11 eyeshadows included and they are all super buttery and creamy. I love that the largest shade in “White Chocolate” is an all-over cream shade that you can use to set your entire eye lid or highlight the inner corners and brow bone with. I can tell I’ve almost hit pan on this one because I use it daily! It’s also the perfect size for travel. I would compare it to the size of my hand, extremely portable and compact. I love that there is variety in the shades, you have cool/warm tones and light/dark. Having such a seamless color range helps me easily create a “put-together” eye look in less than 5 minutes! Also it smells like cocoa so I’m instantly happier each time I use it! This is limited edition, but I found it in stock on the Too Faced website! I will link everything below!

Kat Von D, Shade & Light Face Contour Palette Refill, $14.

Am I the only one who always hits pan on the highlighting/brightening shades in the contour palette first? I can never get through an entire dark bronzing/shading color! I’m so happy Kat Von D started selling refills for the shades in her infamous contour kit. The Shade & Light Palette is my absolute favorite for powder contour and highlight. Her shades are so pigmented, creamy and long lasting! The yellow, “banana” color called, “Lyric” is my absolute favorite for brightening up my under eyes. Sometimes concealer isn’t enough and I need an extra oomph of light! Setting underneath my eyes with “Lyric” helps me look well-rested and more youthful, plus it won’t give you the heinous flashback in photos like some translucent powders can! Since the back of these refills are magnetic, I typically just pop it into a small Z Palette to store it. I would highly recommend these refills if you don’t feel like buying an entire contour palette, especially if you know you’re only going to use 1 or 2 shades! Save your money and only buy what you’ll actually use!

Essence, “Make Me Brow” Eyebrow Gel Mascara, $2.99.

I’ve recently been trying out more affordable products and this eyebrow gel is incredible for the price point! I have mine in the darkest shade, “Browny Brows 02” which brings me to the one and only con I have of this product, not enough shades! At Ulta, there are only 3 shades to choose from, Blondy, Soft Browny and Browny. If you compare to a high end eyebrow brand like Anastasia Beverly Hills, they have six different tinted brow mascaras compared to Essence’s three. I think it would helpful to add a black, light blonde and a red/auburn shade. Now onto all the reasons I love this product! The formula has tiny fibers that attach to your natural hairs and help to build up thickness. My eyebrows do have sparse areas, so running this product over helps fill in any spots in a natural way. It seriously lasts all day without fading or transferring too! It has a really strong hold, so if you like to brush your hairs straight up or lay them flat, you can rest assured that they will stay in that exact style all day long. I really can’t say enough great things about it! I have tried the Benefit Gimme Brow and this is an exact dupe (if not better) and a fraction of the price!

Bite Beauty, Prismatic Pearl Creme Lip Gloss, $22.

Metallic lips are on-trend for Fall 2017! I’ve been loving this lip gloss by Bite Beauty to give me a glittery effect. You can definitely use this product in different ways based on your personal preference. I find that if I wear it on its own and apply it just like a normal lip gloss, it can be a bit too foiled for my liking. Instead, I apply a matte lipstick first, then pat this gloss onto my lips using my ring finger. I mostly just focus it onto the center of my lips to help them appear fuller and more dimensional. These last for so long, which can be rare in glitter glosses. They are also not gritty at all! You can rub your lips together and not feel a single grain of sparkle! I have mine in the shade “Champagne Pearl” because I tend to wear warm nudes on an every day basis, but if you are into more bold lip colors, I would highly recommend checking out “Peacock Pearl.” I swatched the teal/blue shade in store and was blown away by its beauty! It has a green and red shimmer throughout and looked so fun and editorial!

NARS Lipstick, $28.

This is my favorite go-to lipstick! I have the shade “Dolce Vita” and it is a sheer nude pink color. I love this so much because it makes my lips look so healthy and hydrated! This is the type of lipstick that you can put on without a mirror since it’s super creamy and light. Although it does give color to the lips, it definitely is more on the sheer side, which I really like because I can feel comfortable wearing this product at work, on the weekends, day, night, really just any occasion! Even though it is a satin finish, I find that it still lasts on my lips for 2-4 hours, which is a perfect amount of time for me! I would highly recommend these lipsticks if you’re looking for something to wear daily! They have so many shades so you’re bound to find one you love!

Thank you for reading about the products that I’ve been loving for the month of August! As always, I want to know what you are obsessed with! Please leave me a comment letting me know! Also, how crazy is it that we’re already in September?! I think this year is flying by! Like this post if you’re excited for future Fall fashion and makeup content on my blog!

Shop these products:

Too Faced Eyeshadow Palette

Kat Von D Refill PowderEssence Eyebrow Gel

Bite Beauty Lip Gloss

NARS Lipstick

Follow me on Instagram: @abigaillindsayblog

Email any business inquires to:

abigaillindsayblog@gmail.com

How I Stay Tan All Year Long!

Am I the only one who feels 197639640 x better with a tan? I refuse to bake my body in the sun for hours upon end and tanning beds are simply out of the question, so what’s a gal to do? Well, I have been using the best self tanner duo to make sure I have a bronzed glow all year round! I wanted to share these products with you because for years, I was under the impression that the only way I could be tan was to go outside with all the SPF 5 oils, but now I’m really starting to prevent fine lines and wrinkles and with the statistics on skin cancer, it’s just not worth it to me. Self tanning at home always seemed like such a stressful burden to me and I was fearful that I would turn orange or splotchy, but I promise these products will give you a natural, olive-undertone tan!

For my body, I’ve been using the Loving Tan Self Tanning Mousse for years. I was previously trying out a lot of other popular brands like St. Tropez and Fake Bake. They weren’t “bad,” but they weren’t the perfect formula or color for what I really wanted. When I came across the Loving Tan Instagram, I was shocked at the before and afters! That’s really what sold me on trying the product! The difference in one usage was dramatic (in a good way) and I absolutely loved the natural, olive-toned tan that it gave even the most fair-skinned girls! Nothing about it appeared orange or uneven, just a perfect, “I just got back from the beach” suntan! I definitely wanted to try it out for myself and see if it lived up to the hype. I initially ordered their “Ultra Dark” formula, which instructs you to leave it on for at least six hours. I would typically just apply it at night after I have showered and exfoliated, then go to sleep and rinse it off in the morning before work. If you want the most dramatic, “wow I can’t believe I’m this tan” effect, then definitely go for this! It’s worth it to just sleep in for a night to have perfect bronze color for a week without fading! I still enjoy this color, I just would use it only in the summer, or for special events or a vacation in the colder months! Throughout the Fall, Winter, early Spring months, I do use their “2 Hour Express Dark Self Tanning Mousse” because it is just more believable that it’s my skin color! It’s still very tan, but it’s not as deep and I really like that it’s completely ready to rinse off in 2 hours. I like being able to just get it done as soon as I get home from work or on a weekend morning, it’s just really convenient since you don’t have to wait for too long! I really wish they made the “Ultra Dark” in a 2 hour formula, but for now, the dark shall do! They also have a Medium shade if you are very fair and want to ease your way into the self tanning trend! There are many other absolutely amazing things about this self tanner. One of the greatest being NO SMELL! There is nothing worse than getting a spray tan and smelling like absolute garbage for 12 hours. This one is practically odorless and just smells slightly sweet, rather than rancid. It also has a color guide, so as you apply it, you can visibly see the areas that you’ve placed the self tanner and where you haven’t. Don’t worry if you look a tad crazy and splotchy as it dries, I panicked the first time I used this because it looked super dark in some places and not dark enough in others, but once you rinse it off it will look completely even and flawless! I have super sensitive skin all over and it has never broken out my body or face! I also just love that it lasts! It isn’t until about 7-10 days after my initial application, that I start to notice it fading. I really can’t say enough good things about this product! You can absolutely use the self tanning mitt that comes with the product, but I would highly recommend this Tarte one! It’s so soft and fluffy and I think it buffs out the mousse so evenly. I love that it’s so durable as well and will stay put on your hand throughout the application! I’ve actually tried the Loving Tan “Back Applicator” and I just cannot make it work, so please leave me a comment on how you tan your back! 😂

I’ve only been using the Coola “Sunless Tan Anti-Aging Serum” for about a month and it’s absolutely amazing! I use exfoliating skincare products and a Clarisonic nightly, so applying self tanner onto my face doesn’t always make sense when it usually fades in a day or two. I read a lot of reviews on the Coola serum and decided to purchase it to see if I could finally find a product to match my face to the rest of my body! I don’t wear makeup every day, so when I go into public with a fresh face, I do get a bit self conscious knowing my face is visibly more pale compared to the rest of my body. I just mix 2-3 pumps of this serum into my moisturizer and apply it directly to my face. It took 3-4 days for me to get the desired bronzed shade, but wow this stuff is so great and looks natural! The color is even and it will give your skin a glowing appearance! It hasn’t broken me out at all, which is super shocking since most serums do! This one is created with organic ingredients and has hyaluronic acid for anti-aging! It is lightly scented, but I absolutely love it. I’m pretty sure it smells like a sweet, coconut/pineapple scent, which will you feel tropical even in the dead of winter! I will say that the tan does fade after 3-4 days, so you do have to stay consistent with it, but for me it is totally worth it!

Thank you for reading about how I stay tan all year round! These products simply work and I highly recommend them to anyone looking for a safe and natural tan. I really want to know your favorite self tanning products, so please leave me a comment below! Also any orange, cheeto girl horror stories are welcome! 😂 I always picture Ross from friends when he got the Mystic Tan! I hope you all had a great weekend and a great rest of the week!

Shop the Loving Tan Self Tanning Mousse

Shop the Coola Sunless Tan Anti Aging Face Serum

Follow me on Instagram: @abigaillindsayblog

Email any business inquires to:

abigaillindsayblog@gmail.com

Eyebrow Routine!


Eyebrows are essential. I seriously fear leaving my house without having them done…they frame my face and compliment the makeup that I put on. I have naturally full eyebrows, but they're totally different shapes and heights…LOL isn't the saying, "eyebrows are sisters, not twins?" Well, mine are like two distant cousins that live on opposite sides of the country. I do have my good brow (right side) and I can always count on it remaining thick and fluffy, but also nicely arched. My ol' bad brow (left side) is quite a troublemaker and always makes me spend extra time trying to make it symmetrical.

I have used countless brow pencils, powders and pomades. After years of trial and error, I feel like I've finally found a combination that gives me the eyebrows that I love most; natural and bushy! I know what you're thinking, what about tweezing/waxing/threading?! I try to maintain some sort of an arch and pluck any stray hairs underneath the brow and in the middle, but I've stayed away from removing any hair above my eyebrow. It's helped me grow out the horribly over-plucked, sperm shaped mess that took years to undo (thank you, 8th grade) and it gives me more of an undone, natural effect. I love 80's supermodel eyebrows, think Brooke Shields and Cindy Crawford. These ladies brushed their hairs straight up and usually sprayed hairspray on their spoolie to keep them in tact. You definitely don't have to go for this look if you don't like it! It is totally fine if you prefer a more precise, clean brow, I think that look is so beautiful too! I've just had a lot of requests to post an eyebrow routine and I wanted to show you how I've been filling them in lately!

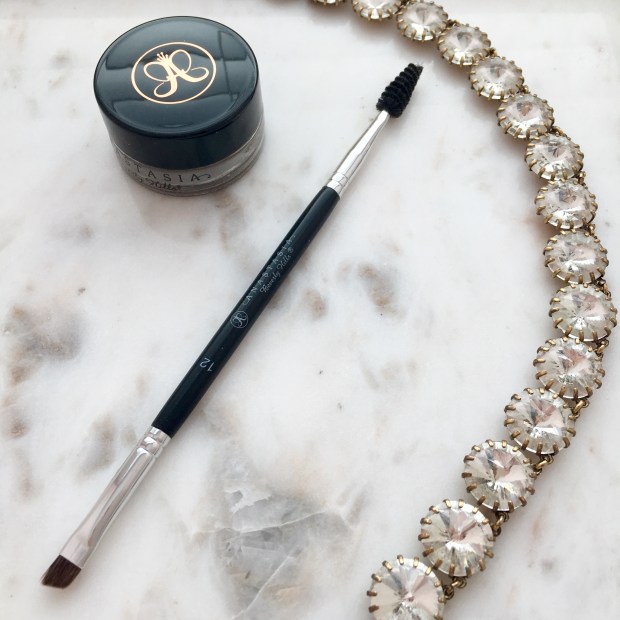
Anastasia Dip Brow Pomade, "Chocolate" and Anastasia #12 Angled Brush.


Anastasia Tinted Brow Gel, "Chocolate" and Givenchy Mister Brow Groom.

  1. These are just my all-natural eyebrows! Something for you to compare for a before and after! ☺️
  2. I always use my Anastasia Dip Brow Pomade. One little jar of this stuff lasts forever and it will never fade throughout the day. I find that it's just the easiest way for me to fill in my brows in a natural way. Using an angled brush, with a spoolie on the other end, also helps me get this done precisely and quickly! I first draw a line underneath the brow to get a defined shape. I always start on the bottom because you can just brush excess product upwards if you apply too much, it's incredibly harder to correct when you start from the top. I focus on emphasizing my arch and extending the tail of my eyebrow as well. With the spoolie side of my brush, I gently swipe any extra product into the hairs, making sure to cover any blank spots.
  3. Now I move onto the top. You can see that I've drawn a pretty harsh line to carve out my arch. This also helps me create additional symmetry and give an illusion that they're the same height.
  4. I've blended all of the lines into the eyebrow hair and brushed through everything a few times with the spoolie. It is so important during this entire routine to never put excess product towards the front of the brows. That's when things can get very unnatural looking! Instead, I take whatever is left on my brush at the very end of the sculpting process and gently fluff it through the front part to lightly shade it in.
  5. I used the Anastasia Tinted Brow Gel to give some highlights and dimension to the hairs. It also helps warm them up a little and match my current hair color a bit more. I love this eyebrow gel on its own, but of course I'm extra and add another one in the mix.
  6. I applied some of my Givenchy Mister Brow Groom and used the applicator to brush upwards on my hairs. This is a clear gel, so it's totally fine if a little gets on your skin from brushing them straight. This product is so pricey, but if you have hairs that fall or get wild throughout the day, it may be worth it. This stuff is like superglue and I love fluffing the front section of my eyebrows with this product. It also helps separate each hair and will help you look like you just naturally have beautiful, bushy brows!

What is your must-have eyebrow product? Have you ever tried any hair growth products that helped you get thick, full brows? Let me know! The bushier, the better and I just want the type of eyebrows that could make Lily Collins envious! I really appreciate you checking out my blog and reading this post! Feel free to leave me suggestions on what I should write about next!

Follow me on Instagram: @abigaillindsayblog

Email any business inquires to:
abigaillindsayblog@gmail.com

What’s In My Travel Makeup Bag?!


I’m super excited to write this post because it indicates vacation season and warm weather! I wanted to share my essential travel makeup products with you, while also giving you some good tips on how to pack light by bringing multipurpose products! A quick disclaimer that sometimes I bring more, sometimes I bring less, but this post is intended to highlight a few helpful tips I try to follow when packing makeup! 


Face

  1. While on vacation, I either wear a full-face of makeup, or none at all! So I do bring a primer; the Too Faced Hangover Rx Primer is my absolute favorite because it is super hydrating and prolongs the wear of my makeup. I always take advantage of any chance I can bring a product in a small travel size too! 
  2. I love using a stick foundation while I’m traveling because I don’t have to worry about a glass bottle breaking in my makeup bag and liquid foundation pouring out everywhere (that has actually happened to me before…) The MakeupForever HD is so great and performs very well in the summer heat!
  3. When I’m traveling, I like to bring the products that are my tried and true favorites, ones that I know will work no matter what. For concealer, my holy grail is the Tarte Shape Tape! It does a great job at both concealing and highlighting my face. This cuts down on my need to bring a corrector, brightening concealer, etc. 
  4. As for powders, I always bring a translucent one since my skin tone is usually getting more tan from sun exposure and I want to make sure that whatever I’m putting on top matches. I love the Laura Mercier translucent powder because it is super light weight and won’t leave behind the dreaded white cast. To contour and highlight, I absolutely love my Tarte contour palette because it has the two different highlight and contour shades to create your perfect, customer color. Plus, it comes with a blush! You can also use the contour shades to fill in your eyebrows or act as a matte transition color to blend into your crease! 
  5. I typically do bring an additional matte bronzer that is more warm toned to compliment my natural tan. I love the Physicians Formula Butter Bronzer because it lasts for so long and smells like a tropical getaway! Since this is matte, I also use this as an all over setting powder (kind of cringe-worthy, I know) but when I’m on vacation, I’ll just take a large fluffy brush and lightly dust bronzer around the entire perimeter of my face for an all-over tanned look. 
  6. This little Becca highlight palette is my BFF for travel! Many highlight powders can be super sensitive to breaking since they’re formulated to be so soft. I love the hard case these come in and the variety of shades I have to choose from. I’m also happy that I can choose a shimmer bronzer and a shimmer blush if I want to top my face with those too! I use all of the colors in this palette for eyeshadows as well! Again, it’s all about finding those compact products that you can use for multiple purposes!


Eyes 

  1. I will never sacrifice brows, no matter how natural I want makeup to be! The Benefit Ka-Brow is an awesome little pomade that lasts through sweat and other unattractive consequences that the heat brings. I’m in love with the packaging on this product because there’s a precise angled brush in the cap! 
  2. Even though I use my Becca highlighting palette on my eyes, I do like to bring one single eyeshadow to wear when I’m on vacation. The PUR eye polish is so awesome because it is formulated with a primer, so you don’t have to pack an extra item. It also gives the eyes a shimmery/glossy look, which I love for a summer makeup look! I always bring a neutral color that will go with any possible outfit that I pack so I don’t have to overthink getting ready. When I’m on vacation, the last thing I want to waste time doing is my hair and makeup! 
  3. I always bring a black eyeliner and a nude eyeliner and Tarte just so happens to make my two faves! I will sometimes bring a liquid liner, but most of the time I just do pencil because I find they last the longest in heat and won’t fade or drip down my face in hot weather! 
  4. For mascara, I like to pack a formula that is both volumizing and lengthening. Again, I’m trying to cut down on bringing multiple products when I can just pack one that does the work of two! A mascara that never fails me is the Tarte “Lights, Camera, Lashes” and they do make a waterproof version as well! I find that this is ultra-black and doesn’t flake or fade throughout the day. Definitely try it if you haven’t yet! 


Lips

  1. For lips, I like to keep it as simple as possible and bring the items I know I will wear and actually use. I love this Tarte lipstick because it’s hydrating, but gives a matte finish! It is also super long-lasting and I love the nude color! 
  2. Sometimes I bring a lipliner, sometimes I don’t, but for the sake of this post I wanted to show you which one I would pack! The Stila lipliners last for such a long time and I’m kind of convinced they may be waterproof…I would pack a neutral color that is pretty similar to my natural lip shade. 
  3. The Fresh Sugar lip treatments are the best tinted balms! These will hydrate and provide a sheer wash of color for natural makeup looks. I love the Berry and Rose colors and definitely want to try out some other shades too! 
  4. Buxom glosses are my absolute favorite and if I were to only pack one lip product, I would probably just take this bad boy! These are formulated to give full coverage color and they will stay glossy for such a long time! I think they feel nourishing on the lips and I love that for humid, dry weather, which is what I experience in the summer! Also they have a super cooling effect when you apply them to your lips; what a bonus! 


 Hair 

  1. Anytime I’m facing humidity, I have to bring a hairspray. I love these mini travel size versions of my favorite Amika hair products! How beautiful is the packaging?! This touchable hairspray is essential for beachy waves that look natural and not crunchy!
  2. Dry shampoo is just a necessity in any situation and this one is by far my favorite! It is super refreshing and gives such good body. I love the smell of it too! I have pretty long hair, so the less amount of time I have to spend washing, drying, styling…the better; so dry shampoo is literally a savior for me on any trip. 


I really hope you enjoyed reading this and finding out what is in my travel makeup bag! Again, sometimes I pack more and sometimes I pack less depending on the duration and location of the trip! These are just the essential items that I use on a daily basis for my go-to, easy makeup looks! What items do you bring on trips? What are some of your tips on packing lightly? What are the best multi-use products that you love for travel? Please leave me a comment below! Thank you again for reading!  


Follow me on Instagram: @abigaillindsayblog


Email any business inquires to:

abigaillindsayblog@gmail.com  

Long Lasting Makeup Routine for Hot Weather!


Summer is a beautiful season, but as we all know, there are times our makeup can turn a tad frightening when mixed with the inescapable heat and humidity. I’m talking about the uneven fading of our face products, our eyeshadow creasing from oily lids, lip products transferring onto the chin or right below the nose…we’ve all been there! You’re sweating and your “effortless glow” has morphed into a “ghastly grease.” I’m here to share with you some tips and tricks to getting your makeup to last and look great while doing so during these hot summer months!       

Face 


It only makes sense to start with a clean canvas, so make sure you’ve removed all excess oil from your skin before you begin any makeup application. I use two different primers during the summer, one to lightly hydrate my skin and one to fill in my pores! The Too Faced “Hangover Rx” Primer does a great job as a moisturizer that also preps the skin for makeup. It has a slightly sticky texture, which will help everything you put on top last for a long time! I also press the NYX “Pore Filler” on the areas I tend to get the most oily. Basically just throughout my t-zone, since that’s where I also have my largest pores. This product works best if you simply press a small amount into your problem areas, rather than rubbing it in all over your face in large circular motions. I use the Tony Moly “Panda Dream” Cooling Stick to hydrate my under-eye area and help my concealer go on smoothly! This product has a really soothing, cold feeling once you apply, which feels extra awesome when it’s hot outside! 


Now that our skin is completely prepped and primed, I actually just add concealer on the areas of my face that I want coverage, rather than using foundation all over. Whenever I know I’m going to be outside and sweating, I try to put as few layers of products on my face. I always need to cover my dark circles and the redness around my nose and chin, so I just use a full-coverage concealer, like the Tarte “Shape Tape” to help hide my problem areas without adding extra layers of cake on my face. I love that this concealer in particular is super long lasting and will not settle into fine lines throughout the day! I do set my entire face with a foundation powder, to give a light layer of evenness to my skin tone and help mattify the look of all the liquid products we just used. I love the Tarte “Amazonian Clay Full Coverage Airbrush Foundation” in “Medium Neutral” because it gives my skin a fresh look and holds up throughout the day without fading or clinging to dry patches! I would highly recommend this product if you’re a big fan of using powder foundations or go for a more natural makeup look on a day-to-day basis! Next, I add a warm-toned bronzer to my temples and cheeks, but I also take a large, fluffy brush and blend out a light layer all over my face too. I like for this makeup to look more seamless and less contoured! The M.A.C bronzer in “Give Me Sun” is super warm and looks like my natural face shade when suntanned! I will then use a Tarte “Amazonian Clay 12-hour Blush” because they last all day throughout the heat! These are some of my favorite blushes and they come in a variety of shades! I love using a more nude/neutral shade of blush when I know I’m going to be outside because my cheeks naturally get flushed and this way, I’m not adding to any of the redness! The shade “Sensual” is a perfect natural shade that blends in perfectly with any bronzer! I love to highlight, so I just make sure to go with one that doesn’t look too icy or frosted on my skin tone since I do tan during the summertime. I have been loving the MakeupForever Highlight in “02 Golden” because it’s a true gold shade that looks gorgeous on the cheekbones and high points of the face! I also sweep some on my shoulders and décolletage whenever I’m wearing tanks or off-the-shoulder tops for that extra glow! The Urban Decay “Chill Makeup Setting Spray” is a new product in my collection, but I’m so impressed by it already! I’ve been using the regular “All Nighter” version for years, but I love the cooling sensation of the “Chill” version! Setting sprays will help your makeup last 10x longer and give you a softer appearance by laying down all of the products on your face so you don’t look overly powdery or matte!


Eyes 


I have oily eyelids during the cold, winter months, so you can only imagine what happens when it’s hot outside…my eyeshadow is wrecked! It will bunch up and crease everywhere unless I use a really good eye primer! I highly recommend the Smashbox “24-Hour Photo Finish” Shadow Primer if you also struggle with unattractively oily eyelids! This one just works the best under hot, sweaty conditions, than any other eye primer in my collection. If I know there’s a good chance I’ll be wiping my eyes or just outside for a long period of time, I make sure to keep my eyeshadow as simple as possible. I’ve been obsessed with the Laura Mercier “Caviar Stick Eye Colour” and for a more natural look, the shade “Rose Gold” has been my go-to! These cream eyeshadows will stay put all day and come in really pretty shades. I was so impressed with the pigmentation, longevity and their ability to hold up against sweat. These are very close to being classified as waterproof in my book. When it’s humid outside, I get a little intimated to do my traditional winged eye liner, just because there’s a good chance it could get wiped away or smudge. I do still want to define my upper eyelid, so I use the Stila “Smudge Stick Waterproof Eyeliner” in “Lionfish.” I basically just draw a line right on my top lid, blending into my lashline and gently smudging out to give a softer look. This is a super low-maintenance, low-risk way of rocking eyeliner in the summertime! If you love waterproof mascara, then of course that should be a top pick when choosing makeup to hold up in the heat! However, I can’t stand wearing it because it’s of it’s difficulty to remove, so the best formula I’ve found in a regular mascara is from Benefit Roller Lash! It’s really long lasting and will hold your lashes curl, plus it doesn’t smudge or flake, which can be an all too common problem during the summer. Raise your hands if you’ve suffered from sudden Raccoon eyes syndrome. I couldn’t forget to mention my holy-grail eyebrow product for every single month, regardless of the weather and that is the Anastasia Beverly Hills “Dip-brow Pomade” in the shade “Brunette.” I love that this is long lasting, but also nearly waterproof so you don’t have to worry about half of your eyebrow sliding off your face. This can take some getting used to and you only need the smallest amount to fill in your entire eyebrow, so make sure to practice using this product beforehand! 


Lips


I’m not a fan of wearing really heavy or bright lip products when I’m going to be outdoors in the summertime because I fear that they’re going to transfer or smudge onto my face. I also don’t enjoy wearing super matte lipsticks because I get dry/irritated lips when it’s sunny and humid outside and that just makes my situation so much worse. My favorite way to have color on my lips, while still staying hydrated and being long lasting, is by filling in my lips with a waterproof lipliner and applying a chapstick or lip treatment with SPF over top! It really helps lock in the liner and give my lips a healthy, smooth appearance. I’m obsessed with the Stila lip liners because they’re retractable (yay for no sharpening) and they last for hours without fading! I love wearing the shade, “Marsala” because it shows up as a peachy-nude color on my skin tone, which is my favorite to wear with natural makeup looks. I’ve been using the Makeup Forever “Ultra HD Lip Booster,” which is just a clear lip serum that moisturizes and plumps up the lips without being sticky or overly glossy! I also wanted to mention the Nudestix “Matte Lip & Cheek Pencil” in the shade “Whisper” because this is a matte lip color that doesn’t dry out my lips and hasn’t transferred, even when it’s really hot outside! I’m not sure why this formula is so long lasting, but this is also a really good product if you really want to use a lipstick! 


I hope you learned some new tips to help your makeup stay intact, even when it’s hot outside! I figured that with summer approaching, this would be helpful information to know! What are your tricks to ensure your makeup stays put in the summertime? Let me know by leaving me a comment! Thank you for reading! 


Follow me on Instagram: @abigaillindsayblog


Email any business inquires to:

abigaillindsayblog@gmail.com  

Soft Spring Makeup Look!

It’s finally Spring and I could not be happier! It’s so refreshing to experience warm weather and I love seeing the sunlight at 6:00 pm! With that said, I’ve been going a little more natural with my makeup just because I want to look really fresh and dewy on a daily basis. I’m sharing an updated everyday makeup routine in case you’re like me and enjoy switching things up based on the seasons! I’m focusing on making my skin as flawless as possible, without looking heavy. Also you can see that I’m choosing natural colors on the eyes, with peach-tones for my blush and lip color!     


The first step in this routine is to apply a luminous primer all over my skin to give me a lit-from-within look. My absolute favorite one is the L’Oreal “Magic Lumi” because it evens out my skin tone and gives me a sheer glow, rather than a glittery or oily effect. Next, I apply my foundation and concealer with a damp beauty sponge, I’ve been loving the new pink one by L’Oreal, but feel free to use whatever you have on hand! I have been obsessed with the L’Oreal “Pro Glow” liquid foundation for giving my skin a luminous, natural finish. If you have oily skin, try their “Pro Matte” version, which is another one of my favorites. The Tarte “Shape Tape” concealer is one of my holy grail makeup products and definitely something you should invest in if you have dark circles! This product will not settle into fine lines and it has awesome, full coverage without ever looking heavy. I place my concealer in an upside down triangle underneath my eyes and I blend some additional dots on the center of my forehead and chin, just to even out the brightness. To keep the glowing look of the skin, but also control my oil, I set my entire face with the Too Faced “Primed and Poreless Pressed Powder.” This is an awesome translucent powder to set your makeup, without adding any additional coverage. Be careful not to add too many layers of this product, or you will end up with the unfortunate white flash back if you are using this powder during photography sessions! I also take the yellow shade from the Tarte “Tarteist” contour palette to set my under eyes and give them an extra layer of brightness! My favorite bronzer to use with this kind of look is the the Too Faced “Sweet Hearts Bronzer” in the shade, “Sweet Tea.” It is a neutral bronze color, so not too orange or too ashy. It has a radiant finish, which looks great in natural lighting! I love a super bright and shimmery highlight for this time of the year, so the Tarte highlight in “Stunner” has been my new obsession! This is by far the longest lasting highlight in my collection, it seriously stays on my cheeks for the entire day without fading! I’m so shocked by the pigmentation and blinding effect is gives my face. In the pan, it looks like it would be too dark for my medium skin tone, but once you apply it, you’ll see that it shows up beautifully! For blush, I used my new favorite Mally blush in the color, “Perfect Peach.” I think this is going to be so gorgeous once I have a deep, olive tan this summer. This is also very long lasting, which is an awesome added bonus! 


For the eyes, I really want to keep it super simple and as neutral as I can! I love my Too Faced “Natural Matte” palette because it’s so easy to create a simple look from the color selection, it’s a no-brainer makeup item. I set my entire eyelid with the shade, “Heaven” to help my other shadows blend effortlessly. I blend “Honey Butter” into the crease to give subtle dimension. I took “Strapless” just on the outer edge to give the look a little extra drama. I also blended this shade on my lower lash line for cohesiveness! My lid shade is the beautiful ColourPop eyeshadow in the shade, “Lovely” and may I just say, I could wear this color every day and be perfectly happy. It’s super pigmented and gives the eyes just enough sparkle! I did black winged liner, per usual and used my Tarte “Rainforest of the Sea So Fine” liner. Feel free to not do eyeliner, or use a brown color to make the eyes appear more natural. I used one of my new favorite drugstore mascaras, the Maybelline “Lash Sensational” is super nice! It really separates and volumizes like a high-end mascara would! For the lips, I used my brand new Tarte “Rainforest of the Sea Color Splash” lipstick in the shade “Sunkissed,” which is probably my new favorite lipstick color and formula! These are so buttery and long lasting, perfect for spring and summer when your lips naturally feel more dry! I topped that off with all-time favorite nude gloss by Buxom in the shade “White Russian” to match the rest of my dewy makeup look! I didn’t include a photo, but I sprayed my entire face with the Urban Decay “All-Nighter” setting spray to lock my face into place and blend all the products with one another! 


Did you enjoy reading this post? Let me know in the comments below! I read and respond to every person and love interacting with you! I want to know your must-have makeup products for Spring 2017! Thank you for reading! 


Follow me on Instagram: @abigaillindsayblog


Email any business inquires to:

abigaillindsayblog@gmail.com  

Nighttime Pamper Routine!


I have always wanted to be the type of girl that could make time for fun things like spa days and massages. However, the older I get, the harder it is to prioritize my schedule to include something that’s only meant to make me feel spoiled and special. Whenever I’m feeling stressed or overwhelmed, I like to have an at-home pamper night! I try my hardest to turn my mind off and unwind, while using products that make me feel like I’m in a fancy spa! 


My first step in my pamper routine is to take a hot bath! This is essential because too often I just shower super quickly and forget to even take the time to unwind in a jacuzzi bath. I love using LUSH Bath Bombs because they smell amazing and make your water look really pretty! This one is the, “Butterbear” Bath Bomb and it smells incredible, just like cocoa powder! Next, I like to exfoliate my body with a sugar scrub! I love using the Tree Hut “Sugar Shea Scrub” from head-to-toe! It’s gentle enough to not irritate my sensitive skin, however it will remove all dead skin and any remaining self tanner that hasn’t faded off naturally! After I’ve shampooed and conditioned my hair, I like to apply a hair mask to give extra moisture and help repair any dry/damaged strands! Recently, I’ve been obsessed with the OUAI “Treatment Mask.” I just apply it on my clean, damp hair and let it sit for 10-15 minutes. My hair feels like absolute silk when I’m finished with it! Lastly, once I’m finished with the bath and completely dried off, I like to apply the Shea Moisture “100% Extra Virgin Coconut Oil” all over my body, like I would a regular lotion. I feel like I’ve seen a difference in my skin since I switched over to coconut oil from body creams! Not only does it feel more hydrated and healthy, but I’ve noticed it’s not as itchy and irritated, which would happen all the time after using artificially scented body butters. I definitely can’t use this product as a hair mask because it’s way too heavy and I look like a greased chicken the next day, but it makes an awesome all over the body moisturizer! 


Now that I have clean skin and I’m feeling super relaxed, it’s time for a face mask! My favorite one to apply is the award winning Fresh “Rose Face Mask” because it not only hydrates, but it also tones! I feel like it’s so hard to find a mask that does both! It’s all-natural and smells like fresh roses! Sometimes I feel like doing something fun and different so I’ll grab a sheet mask instead! I love the Tony Moly line of sheet masks because there is such variety available for all the different skin types out there! Plus, the packaging is absolutely adorable! After I’ve left my face mask on for about 20-30 minutes, I rinse that off and immediately apply my nightly skincare! I’ve been using my favorite Origins “High Potency Night-A-Mins” moisturizer for years and it is SO GOOD! I recommend this product to everyone, dry skin, combo, or oily skin; you just need it! I also always apply an eye cream, recently I’ve been loving the Tarte “Maracuja C-Brighter Eye Treatment” because it’s incredibly hydrating and helps plump up the skin where I have fine lines! Now that I’m finished with my face, it’s time to treat my feet! If you are in need of a super hydrating and luxurious lotion for an at-home pedicure, then you must try the L’Occitane Foot Cream! It is incredible the difference that this makes, especially on my heels! I’ve been a fan of the hand cream for awhile now, but this product is a game changer! Of course, I can’t forget about my lips and every single night I apply Aquaphor to keep them moisturized! It doesn’t have a scent, which I love and I always wake up with hydrated lippies that are ready for lipstick application! 


Hopefully this post gave you some good ideas on the types of products to try out if you’re wanting to pamper yourself! I think it’s so important to take a break from all the craziness that happens in our every day lives and unwind! If you have products that relax you, please comment them on this post! I hope you have a wonderful week and I appreciate you taking the time to read! 


Follow me on Instagram: @abigaillindsayblog


Email any business inquires to:

abigaillindsayblog@gmail.com