Natasha Denona Eyeshadow Palette 5! Review and Swatches!

Have you ever heard of Natasha Denona? She is an international, highly acclaimed makeup artist who started her own brand! Her signature look includes glowing skin and shimmering eyes, so it’s no surprise that the majority of products in her line will give you a similar appearance! I have read many reviews about her eyeshadows being incredibly pigmented and blendable, but they’re also pricey, so I decided to wait until I could buy during a random sale at Sephora. I recently was able to earn 4x the points as a VIB Rouge, so I decided to purchase the palette and use it towards maintaining my rewards status until 2019! I wasn’t planning on dedicating an entire blog post to this product, but as soon as I swatched it, I knew I had to share it with you all!

I got the 5 pan palette because I really couldn’t commit to the cringe-worthy price of her larger 28 shade palettes ($239) YIKES. Now that I’ve tried the shadows, I know they’re definitely something special, but I personally could never justify spending that much on eyeshadow, sigh. However, for $48, you can get 5 extremely high quality eyeshadows in 13 different color combinations. I decided to purchase “4,” which includes the shades, Aura, Cool Bronze, Oxide, Cool Plum and Moonstone. I love wearing one metallic color across my entire lid and they’re all gold/rose gold/bronze tones, which are my absolute favorite for every day makeup looks. I wanted to buy the colors that I knew I would get the most wear out of! I was super close to getting “2” and “10,” but I’m extremely happy with my choice and find the colors to actually be more wearable than the online product photos portray!

I barely pressed my finger into the first eyeshadow and was truly shook at the color payoff. Like you need the smallest amount to get a full, metallic, pigmented layer of color on your eyes. I tried these shadows with my fingers and brushes and they definitely show up more foiled with your finger, but if you want a more subtle effect, I would recommend a flat, synthetic shader brush! The shade “Cool Plum” is a satin matte formula, so that’s why it isn’t “BAM” when you look at it compared to the other shades! I used it in my crease to add depth and it was really creamy and blended so well. These have minimal fall-out, which is so rare for a sparkle/glitter eyeshadow. They are even water-resistant…so you know that implies how long-wearing and fade-proof these will be throughout the day!

Here is just a little natural, easy eyeshadow look that I created with this palette!

  1. I only have eyeshadow primer and translucent powder on my eye at this point, no shadows!
  2. Since there isn’t a matte transitional shade in the palette, I threw some bronzer in the crease to help add depth and blend any harsh lines from the lid shades that I apply next.
  3. I patted Moonstone on the inner half of my eyelid. I wanted to use a brighter shade towards the front of my eyes to help them appear larger!
  4. With a flat shader brush, I swept “Cool Bronze” on the outer half of my eye. I love the subtle transition from light-to-dark that this combination of colors gave!
  5. Using a fluffy blending brush, I buffed “Cool Plum” into my outer third to give depth and shape my eye. With my finger, I patted “Aura” on my inner corners to help open the eyes and help me look more awake!
  6. I really dislike this angle because eye whites and veins 😂 however, I wanted to show you that I used “Oxide” on my lower lash line to give a little drama and definition!

Here’s the final look! As you can see, it really came out super natural and it was incredibly easy to create! I’m so excited to wear these warm metallic shades in the Fall with a dark red lip! I really want to buy another one of these 5 pan palettes, but have you seen the new Natasha Denona “Lila” Eyeshadow Palette coming out to Sephora in September?! It has 15 eyeshadows, so of course it’s expensive, but the colors are literally calling my name! So many purple and gold shades, which are my absolute favorite to wear! Let me know if you’re thinking about getting it, I want to read your opinion of the swatches! Thank you so much for reading!

Follow me on Instagram: @abigaillindsayblog

Email any business inquires to:

abigaillindsayblog@gmail.com

How I Stay Tan All Year Long!

Am I the only one who feels 197639640 x better with a tan? I refuse to bake my body in the sun for hours upon end and tanning beds are simply out of the question, so what’s a gal to do? Well, I have been using the best self tanner duo to make sure I have a bronzed glow all year round! I wanted to share these products with you because for years, I was under the impression that the only way I could be tan was to go outside with all the SPF 5 oils, but now I’m really starting to prevent fine lines and wrinkles and with the statistics on skin cancer, it’s just not worth it to me. Self tanning at home always seemed like such a stressful burden to me and I was fearful that I would turn orange or splotchy, but I promise these products will give you a natural, olive-undertone tan!

For my body, I’ve been using the Loving Tan Self Tanning Mousse for years. I was previously trying out a lot of other popular brands like St. Tropez and Fake Bake. They weren’t “bad,” but they weren’t the perfect formula or color for what I really wanted. When I came across the Loving Tan Instagram, I was shocked at the before and afters! That’s really what sold me on trying the product! The difference in one usage was dramatic (in a good way) and I absolutely loved the natural, olive-toned tan that it gave even the most fair-skinned girls! Nothing about it appeared orange or uneven, just a perfect, “I just got back from the beach” suntan! I definitely wanted to try it out for myself and see if it lived up to the hype. I initially ordered their “Ultra Dark” formula, which instructs you to leave it on for at least six hours. I would typically just apply it at night after I have showered and exfoliated, then go to sleep and rinse it off in the morning before work. If you want the most dramatic, “wow I can’t believe I’m this tan” effect, then definitely go for this! It’s worth it to just sleep in for a night to have perfect bronze color for a week without fading! I still enjoy this color, I just would use it only in the summer, or for special events or a vacation in the colder months! Throughout the Fall, Winter, early Spring months, I do use their “2 Hour Express Dark Self Tanning Mousse” because it is just more believable that it’s my skin color! It’s still very tan, but it’s not as deep and I really like that it’s completely ready to rinse off in 2 hours. I like being able to just get it done as soon as I get home from work or on a weekend morning, it’s just really convenient since you don’t have to wait for too long! I really wish they made the “Ultra Dark” in a 2 hour formula, but for now, the dark shall do! They also have a Medium shade if you are very fair and want to ease your way into the self tanning trend! There are many other absolutely amazing things about this self tanner. One of the greatest being NO SMELL! There is nothing worse than getting a spray tan and smelling like absolute garbage for 12 hours. This one is practically odorless and just smells slightly sweet, rather than rancid. It also has a color guide, so as you apply it, you can visibly see the areas that you’ve placed the self tanner and where you haven’t. Don’t worry if you look a tad crazy and splotchy as it dries, I panicked the first time I used this because it looked super dark in some places and not dark enough in others, but once you rinse it off it will look completely even and flawless! I have super sensitive skin all over and it has never broken out my body or face! I also just love that it lasts! It isn’t until about 7-10 days after my initial application, that I start to notice it fading. I really can’t say enough good things about this product! You can absolutely use the self tanning mitt that comes with the product, but I would highly recommend this Tarte one! It’s so soft and fluffy and I think it buffs out the mousse so evenly. I love that it’s so durable as well and will stay put on your hand throughout the application! I’ve actually tried the Loving Tan “Back Applicator” and I just cannot make it work, so please leave me a comment on how you tan your back! 😂

I’ve only been using the Coola “Sunless Tan Anti-Aging Serum” for about a month and it’s absolutely amazing! I use exfoliating skincare products and a Clarisonic nightly, so applying self tanner onto my face doesn’t always make sense when it usually fades in a day or two. I read a lot of reviews on the Coola serum and decided to purchase it to see if I could finally find a product to match my face to the rest of my body! I don’t wear makeup every day, so when I go into public with a fresh face, I do get a bit self conscious knowing my face is visibly more pale compared to the rest of my body. I just mix 2-3 pumps of this serum into my moisturizer and apply it directly to my face. It took 3-4 days for me to get the desired bronzed shade, but wow this stuff is so great and looks natural! The color is even and it will give your skin a glowing appearance! It hasn’t broken me out at all, which is super shocking since most serums do! This one is created with organic ingredients and has hyaluronic acid for anti-aging! It is lightly scented, but I absolutely love it. I’m pretty sure it smells like a sweet, coconut/pineapple scent, which will you feel tropical even in the dead of winter! I will say that the tan does fade after 3-4 days, so you do have to stay consistent with it, but for me it is totally worth it!

Thank you for reading about how I stay tan all year round! These products simply work and I highly recommend them to anyone looking for a safe and natural tan. I really want to know your favorite self tanning products, so please leave me a comment below! Also any orange, cheeto girl horror stories are welcome! 😂 I always picture Ross from friends when he got the Mystic Tan! I hope you all had a great weekend and a great rest of the week!

Shop the Loving Tan Self Tanning Mousse

Shop the Coola Sunless Tan Anti Aging Face Serum

Follow me on Instagram: @abigaillindsayblog

Email any business inquires to:

abigaillindsayblog@gmail.com

Eyebrow Routine!


Eyebrows are essential. I seriously fear leaving my house without having them done…they frame my face and compliment the makeup that I put on. I have naturally full eyebrows, but they're totally different shapes and heights…LOL isn't the saying, "eyebrows are sisters, not twins?" Well, mine are like two distant cousins that live on opposite sides of the country. I do have my good brow (right side) and I can always count on it remaining thick and fluffy, but also nicely arched. My ol' bad brow (left side) is quite a troublemaker and always makes me spend extra time trying to make it symmetrical.

I have used countless brow pencils, powders and pomades. After years of trial and error, I feel like I've finally found a combination that gives me the eyebrows that I love most; natural and bushy! I know what you're thinking, what about tweezing/waxing/threading?! I try to maintain some sort of an arch and pluck any stray hairs underneath the brow and in the middle, but I've stayed away from removing any hair above my eyebrow. It's helped me grow out the horribly over-plucked, sperm shaped mess that took years to undo (thank you, 8th grade) and it gives me more of an undone, natural effect. I love 80's supermodel eyebrows, think Brooke Shields and Cindy Crawford. These ladies brushed their hairs straight up and usually sprayed hairspray on their spoolie to keep them in tact. You definitely don't have to go for this look if you don't like it! It is totally fine if you prefer a more precise, clean brow, I think that look is so beautiful too! I've just had a lot of requests to post an eyebrow routine and I wanted to show you how I've been filling them in lately!

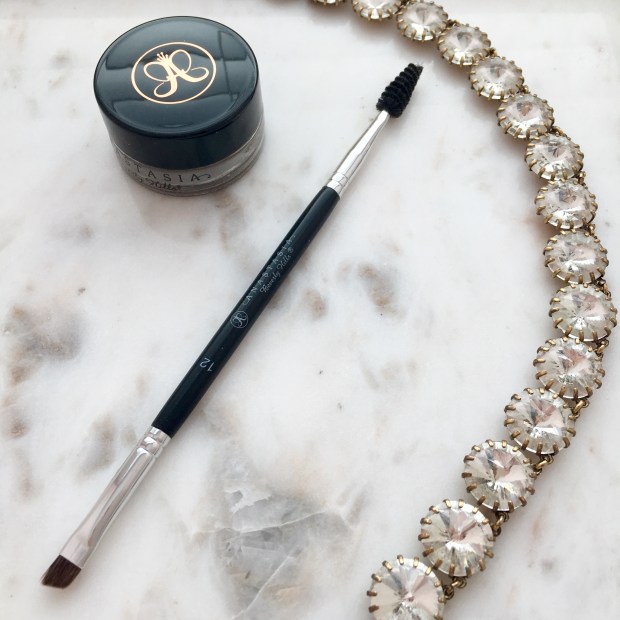
Anastasia Dip Brow Pomade, "Chocolate" and Anastasia #12 Angled Brush.


Anastasia Tinted Brow Gel, "Chocolate" and Givenchy Mister Brow Groom.

  1. These are just my all-natural eyebrows! Something for you to compare for a before and after! ☺️
  2. I always use my Anastasia Dip Brow Pomade. One little jar of this stuff lasts forever and it will never fade throughout the day. I find that it's just the easiest way for me to fill in my brows in a natural way. Using an angled brush, with a spoolie on the other end, also helps me get this done precisely and quickly! I first draw a line underneath the brow to get a defined shape. I always start on the bottom because you can just brush excess product upwards if you apply too much, it's incredibly harder to correct when you start from the top. I focus on emphasizing my arch and extending the tail of my eyebrow as well. With the spoolie side of my brush, I gently swipe any extra product into the hairs, making sure to cover any blank spots.
  3. Now I move onto the top. You can see that I've drawn a pretty harsh line to carve out my arch. This also helps me create additional symmetry and give an illusion that they're the same height.
  4. I've blended all of the lines into the eyebrow hair and brushed through everything a few times with the spoolie. It is so important during this entire routine to never put excess product towards the front of the brows. That's when things can get very unnatural looking! Instead, I take whatever is left on my brush at the very end of the sculpting process and gently fluff it through the front part to lightly shade it in.
  5. I used the Anastasia Tinted Brow Gel to give some highlights and dimension to the hairs. It also helps warm them up a little and match my current hair color a bit more. I love this eyebrow gel on its own, but of course I'm extra and add another one in the mix.
  6. I applied some of my Givenchy Mister Brow Groom and used the applicator to brush upwards on my hairs. This is a clear gel, so it's totally fine if a little gets on your skin from brushing them straight. This product is so pricey, but if you have hairs that fall or get wild throughout the day, it may be worth it. This stuff is like superglue and I love fluffing the front section of my eyebrows with this product. It also helps separate each hair and will help you look like you just naturally have beautiful, bushy brows!

What is your must-have eyebrow product? Have you ever tried any hair growth products that helped you get thick, full brows? Let me know! The bushier, the better and I just want the type of eyebrows that could make Lily Collins envious! I really appreciate you checking out my blog and reading this post! Feel free to leave me suggestions on what I should write about next!

Follow me on Instagram: @abigaillindsayblog

Email any business inquires to:
abigaillindsayblog@gmail.com

July Fashion Favorites!

I was feeling inspired to do something fresh and different! Makeup is always going to be "my thing," but I get a lot of requests to show more of my style. I want to write more fashion posts since my taste in clothing is evolving and I think it would be something cool to document! The items I share will be pieces that I constantly wear and love. Before I spend money on anything, I always check out the reviews. Since I'm just a normal girl, with a normal life; it excites me to create honest, trustworthy content about trendy pieces you may see heavily promoted on Instagram and Facebook. I'll let you know what is really worth the hype! I hope you enjoy reading a new and different kind of post from me! Let me know if you would enjoy seeing more fashion posts on my blog!


Marc Fisher LTD, "Adalyn Espadrille Wedge Sandal"

These shoes are definitely my favorite for summer! I really only bought them after reading countless bloggers claim that they were the most comfortable wedge. They are pricey, but I personally could create countless outfits incorporating these shoes, so I was able to justify it! They really are comfortable and easy to walk in, while providing some much needed height! (I'm only 5'3) I did purchase mine in the "Tan/Saddle" color because I knew they would match my entire wardrobe. I have worn these shoes with dresses, skirts, jeans, shorts, and they work every time! I definitely think they'll transition nicely into Fall because they are suede. I would pair these with distressed denim and a slouchy sweater or an oversized cardigan once the weather gets cooler. If you've been on the fence about these, I would say you should go for it! I'm so happy I decided to take the plunge because I wear them weekly. I did order a half-size down and went with a 7, which was the perfect fit!


Quay Australia, "Needing Frame 65mm Aviator Sunglasses" (Forgot to take a photo of these, so I inserted a product image from Nordstrom 😂🙈)

After seeing Jennifer Lopez (my role model) wear these on Instagram, I knew I had to try them out for myself. What's good enough for J.Lo, is good enough for me! I have received countless compliments from complete strangers and I love telling them, "They're only 55 bucks!" Compared to my beloved Ray-Ban Aviators, that's a complete steal! These are lighter in weight, which makes them super comfortable. I love the oversized look and super dark frames! These also have gold detailing, which is my personal preference in metal accents. I can see why so many people hype up Quay sunglasses! I really would like to try another pair, so let me know the name of your favorite frame style!


Zella, "Live In High Waist Leggings"

I was a LuluLemon snob and totally bought into the hype. I just assumed that I had to pay an arm and a leg to not have my booty show through my leggings. I was wrong and Zella showed me that. If you have been on the hunt for leggings that are thick enough to be opaque and comfortable enough to not interfere with your breathing, than look no further! I truly prefer these over any other high end legging that I've tried! The price is right at $54 and I can throw these in the wash 100 times and they still look brand new. I love all things "high waist" and these are no exception! The cut is so slimming and will give you the most flattering shape! You can wear these to work out or underneath an oversized flannel, even with a baggy sweater for a casual Fall outfit, literally anything! I have gotten so many of my friends hooked on these babies because I cannot recommend them enough!


Joe's Jeans

Continuing with the pants theme, may I introduce you to the best jeans I've ever owned? No joke, these are hands down worth every penny and I don't think I'll ever try another brand again! I have shorts, distressed and regular styles and they're all my favorite. First and foremost, these jeans are comfortable. I find myself coming home and keeping them on for hours, rather than immediately changing into comfy sweats as my jeans from yesteryear forced me to do. Secondly, the waist is stretchy, but doesn't stretch out. There's few things worse than putting on jeans and within a couple of hours of wear, finding yourself yanking on belt loops, hoisting the disappointing denim back up. Joe's Jeans magically keep their shape, so you never have to worry about anything being uncomfortably tight or indecently loose. Regardless of how many times they're washed, they do not lose their color! I've noticed that the fading is so minimal that all of my pairs still look brand new. The skinny ankle style fits someone 5'4 and under at a normal length, so I would highly recommend that to short gals like me that have a hard time finding jeans that fit in all the right places!


Kendra Scott, "Elisa Pendant Necklace"

I've been wanting a piece of jewelry from Kendra Scott for so long! I was recently on vacation and came across this dainty necklace and knew I had to have it! It's the perfect length for anything, casual or dressy, it just works. You can totally layer it with other delicate necklaces for a trendy stacked effect. It is a shorter chain and sits right above my neckline. I also love the rose colored stone, but they have a ton of other options to choose from as well! It's very affordable in my opinion for something I wear every day. If you enjoy minimalistic jewelry that feels and looks luxurious, then I would highly recommend you try out the "Elisa Pendant Necklace." Even though jewelry preferences are so personal, I feel like this would be a great gift since it is very simple and versatile!

Thank you so much for reading! I really enjoyed writing about my fashion favorites, so let me know if would enjoy this type of content! You can purchase all of these items at Nordstrom and I will leave links below! I also wanted to thank everyone who has recently followed me on Instagram! I'm having so much fun posting and interacting with you all! I hope everyone has a great week!

Marc Fisher Wedges
Quay Sunglasses
Zella Leggings
Joe's Jeans
Kendra Scott Necklace

Follow me on Instagram: @abigaillindsayblog

Email any business inquires to:
abigaillindsayblog@gmail.com