Touch In Sol Metallist Liquid Foil & Glitter Eye Shadow Duo Review! 

Touch In Sol, Metallist Liquid Foil & Glitter Eye Shadow Duo, $25.


I’m the type of girl who finds glitter appropriate for any occasion. Daytime or nighttime, I love to wear shimmery shades on my eyelids with zero shame. The “Touch In Sol Metallist Liquid Foil & Glitter Eye Shadow Duo” is a double-ended, liquid and glitter eyeshadow duo that claims to be very pigmented and long-lasting! I had initially checked out this product while browsing Sephora.com, but it didn’t have a lot of reviews at the time, so I decided to skip out. I was recently watching Jaclyn Hill and she was raving about how amazing this product is, so I decided to pick it up before all the colors sold out! I got mine in the shade, “Margaret” which is described as a champagne shade online. I do think it is more of a copper-champagne shade just because it has more of a rusty undertone than gold.
     

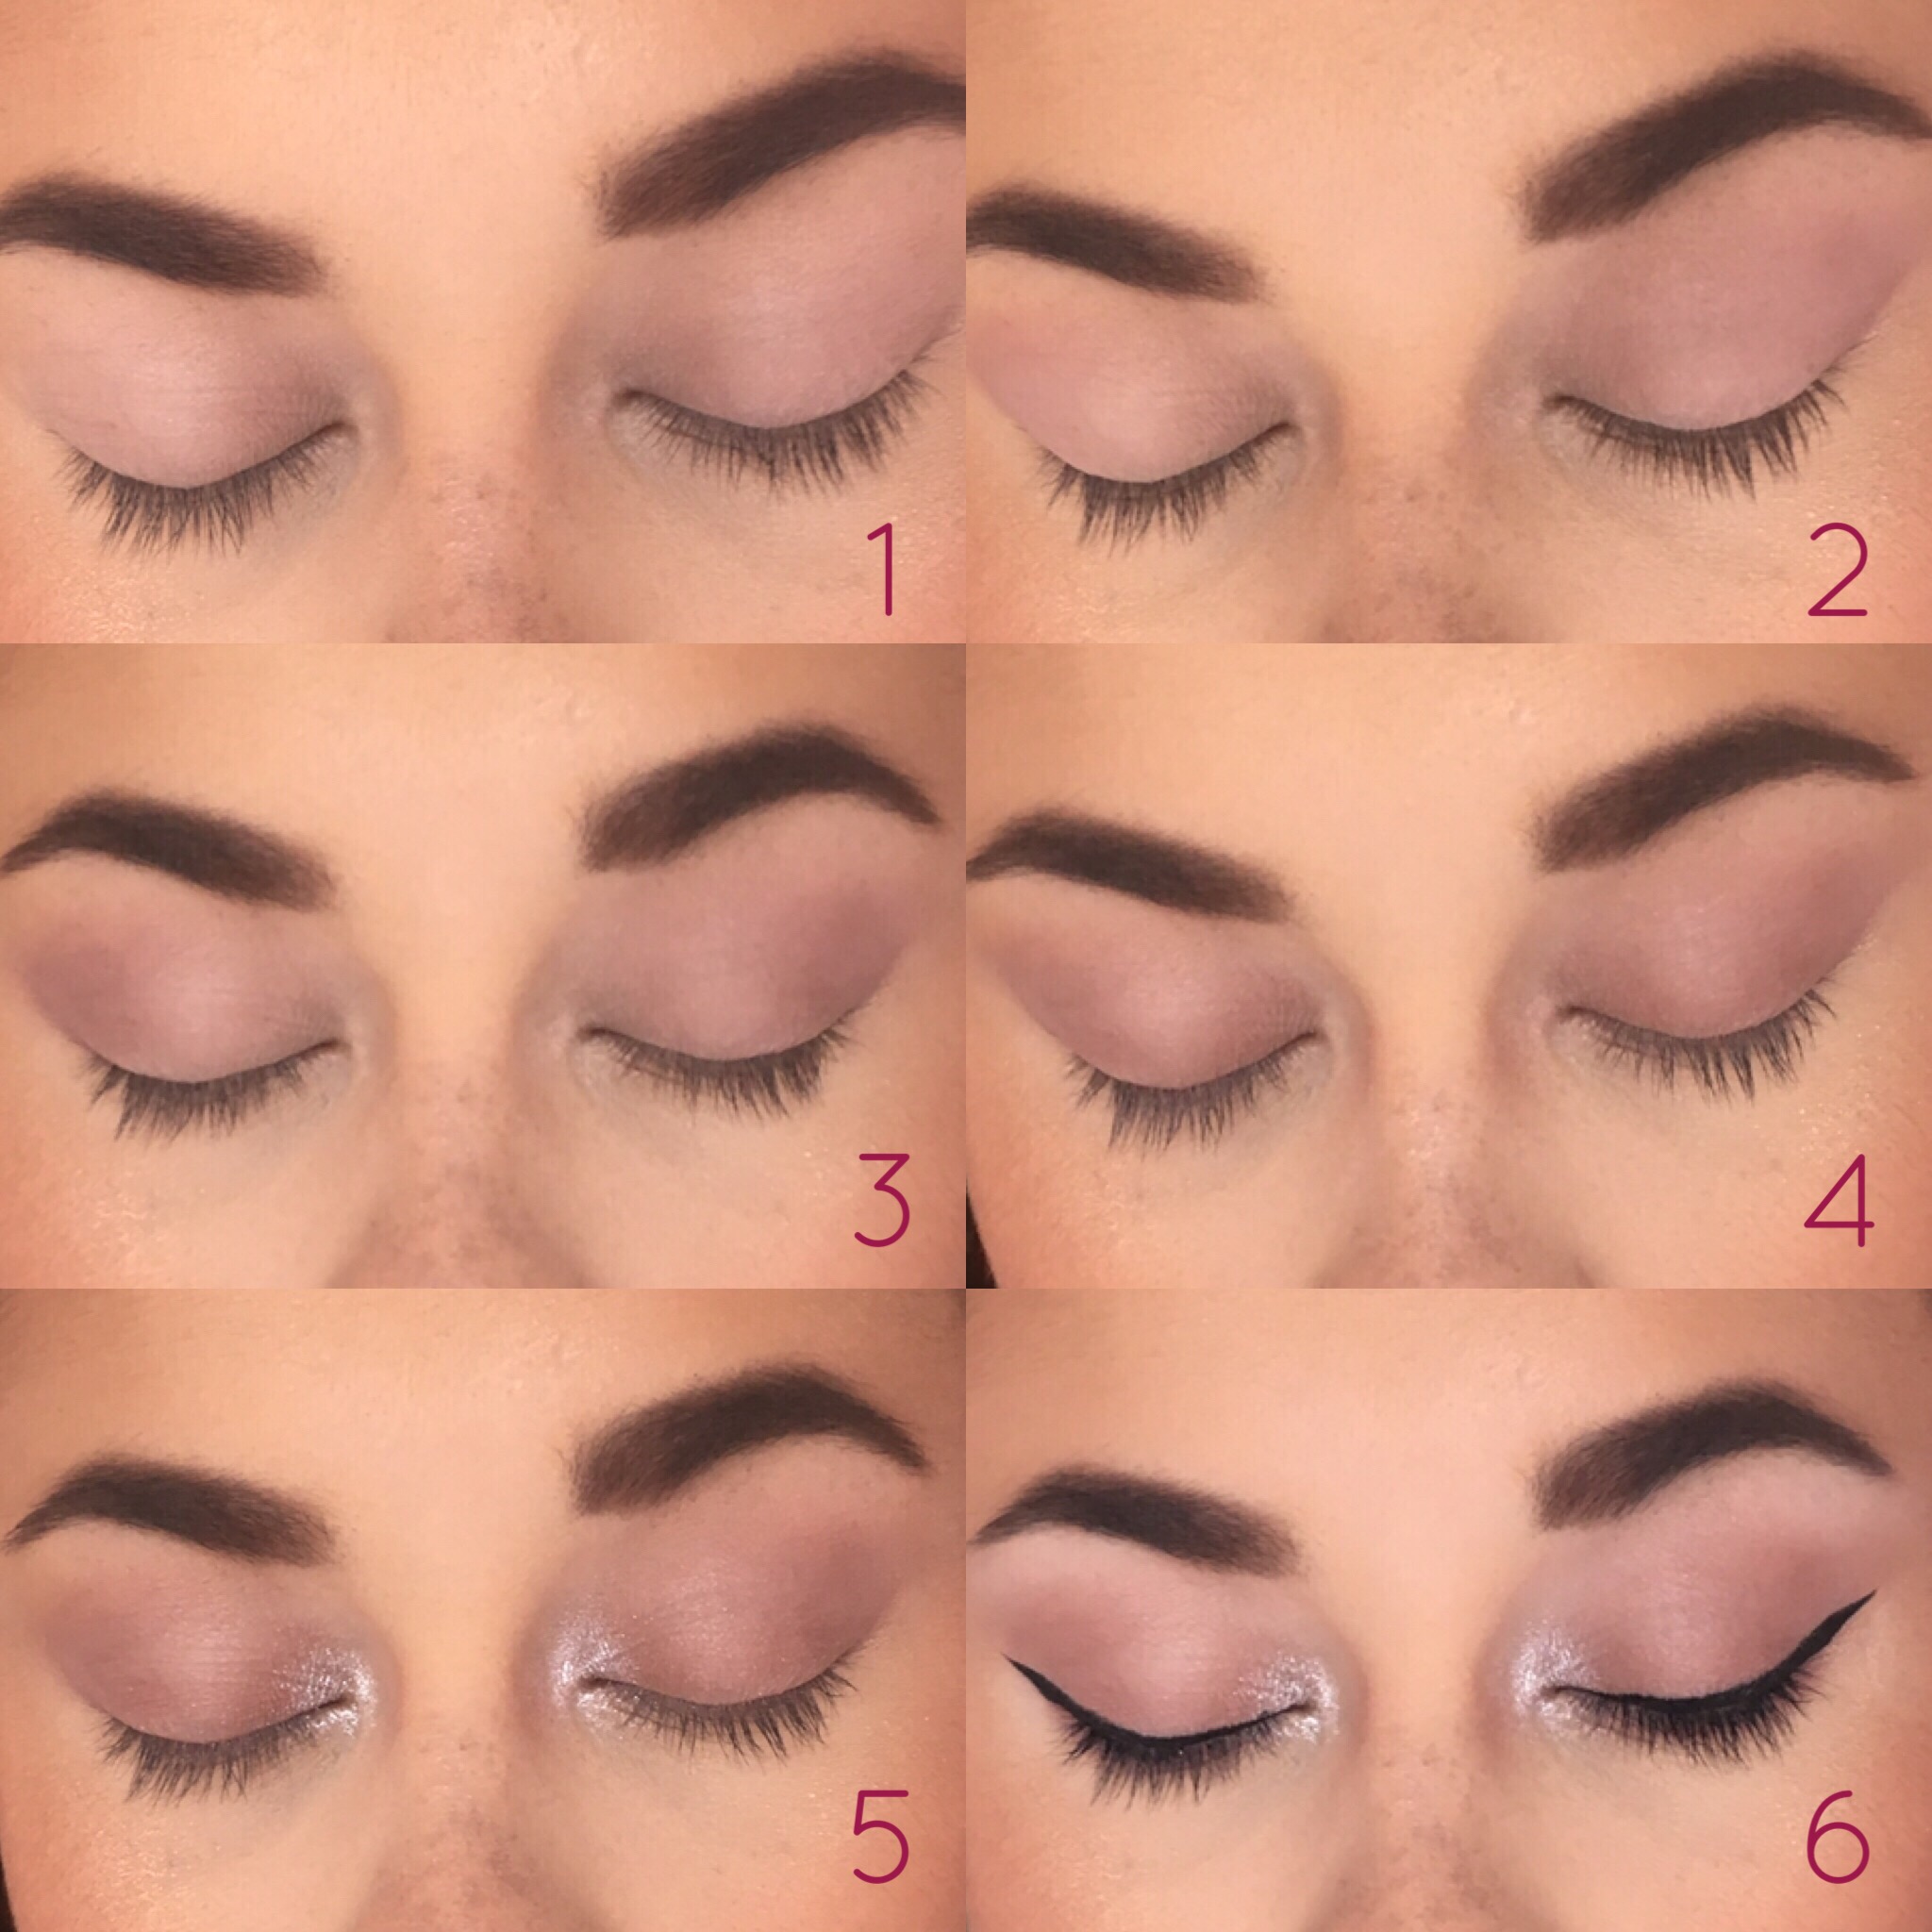
I decided to use the M.A.C paint pot in “Soft Ochre” before applying the liquid eyeshadow. I wanted to use a more “dry” formula of primer to prevent any creasing that tends to come with gel or liquid eyeshadow products. I applied the liquid eyeshadow straight from the applicator and onto my eyelids. Then I buffed out the edges and smoothed it over by gently tapping my finger over the lid. Next, I used a blending brush with no eyeshadow on it and tried to blend the edges of the liquid. I took the Makeup Geek eyeshadow in the shade, “Peach Smoothie” to provide some definition to my crease and further blend the eyelid color. I also took another Makeup Geek eyeshadow in the shade “Bitten” and blended it into my outer crease for a wide-eye effect. 

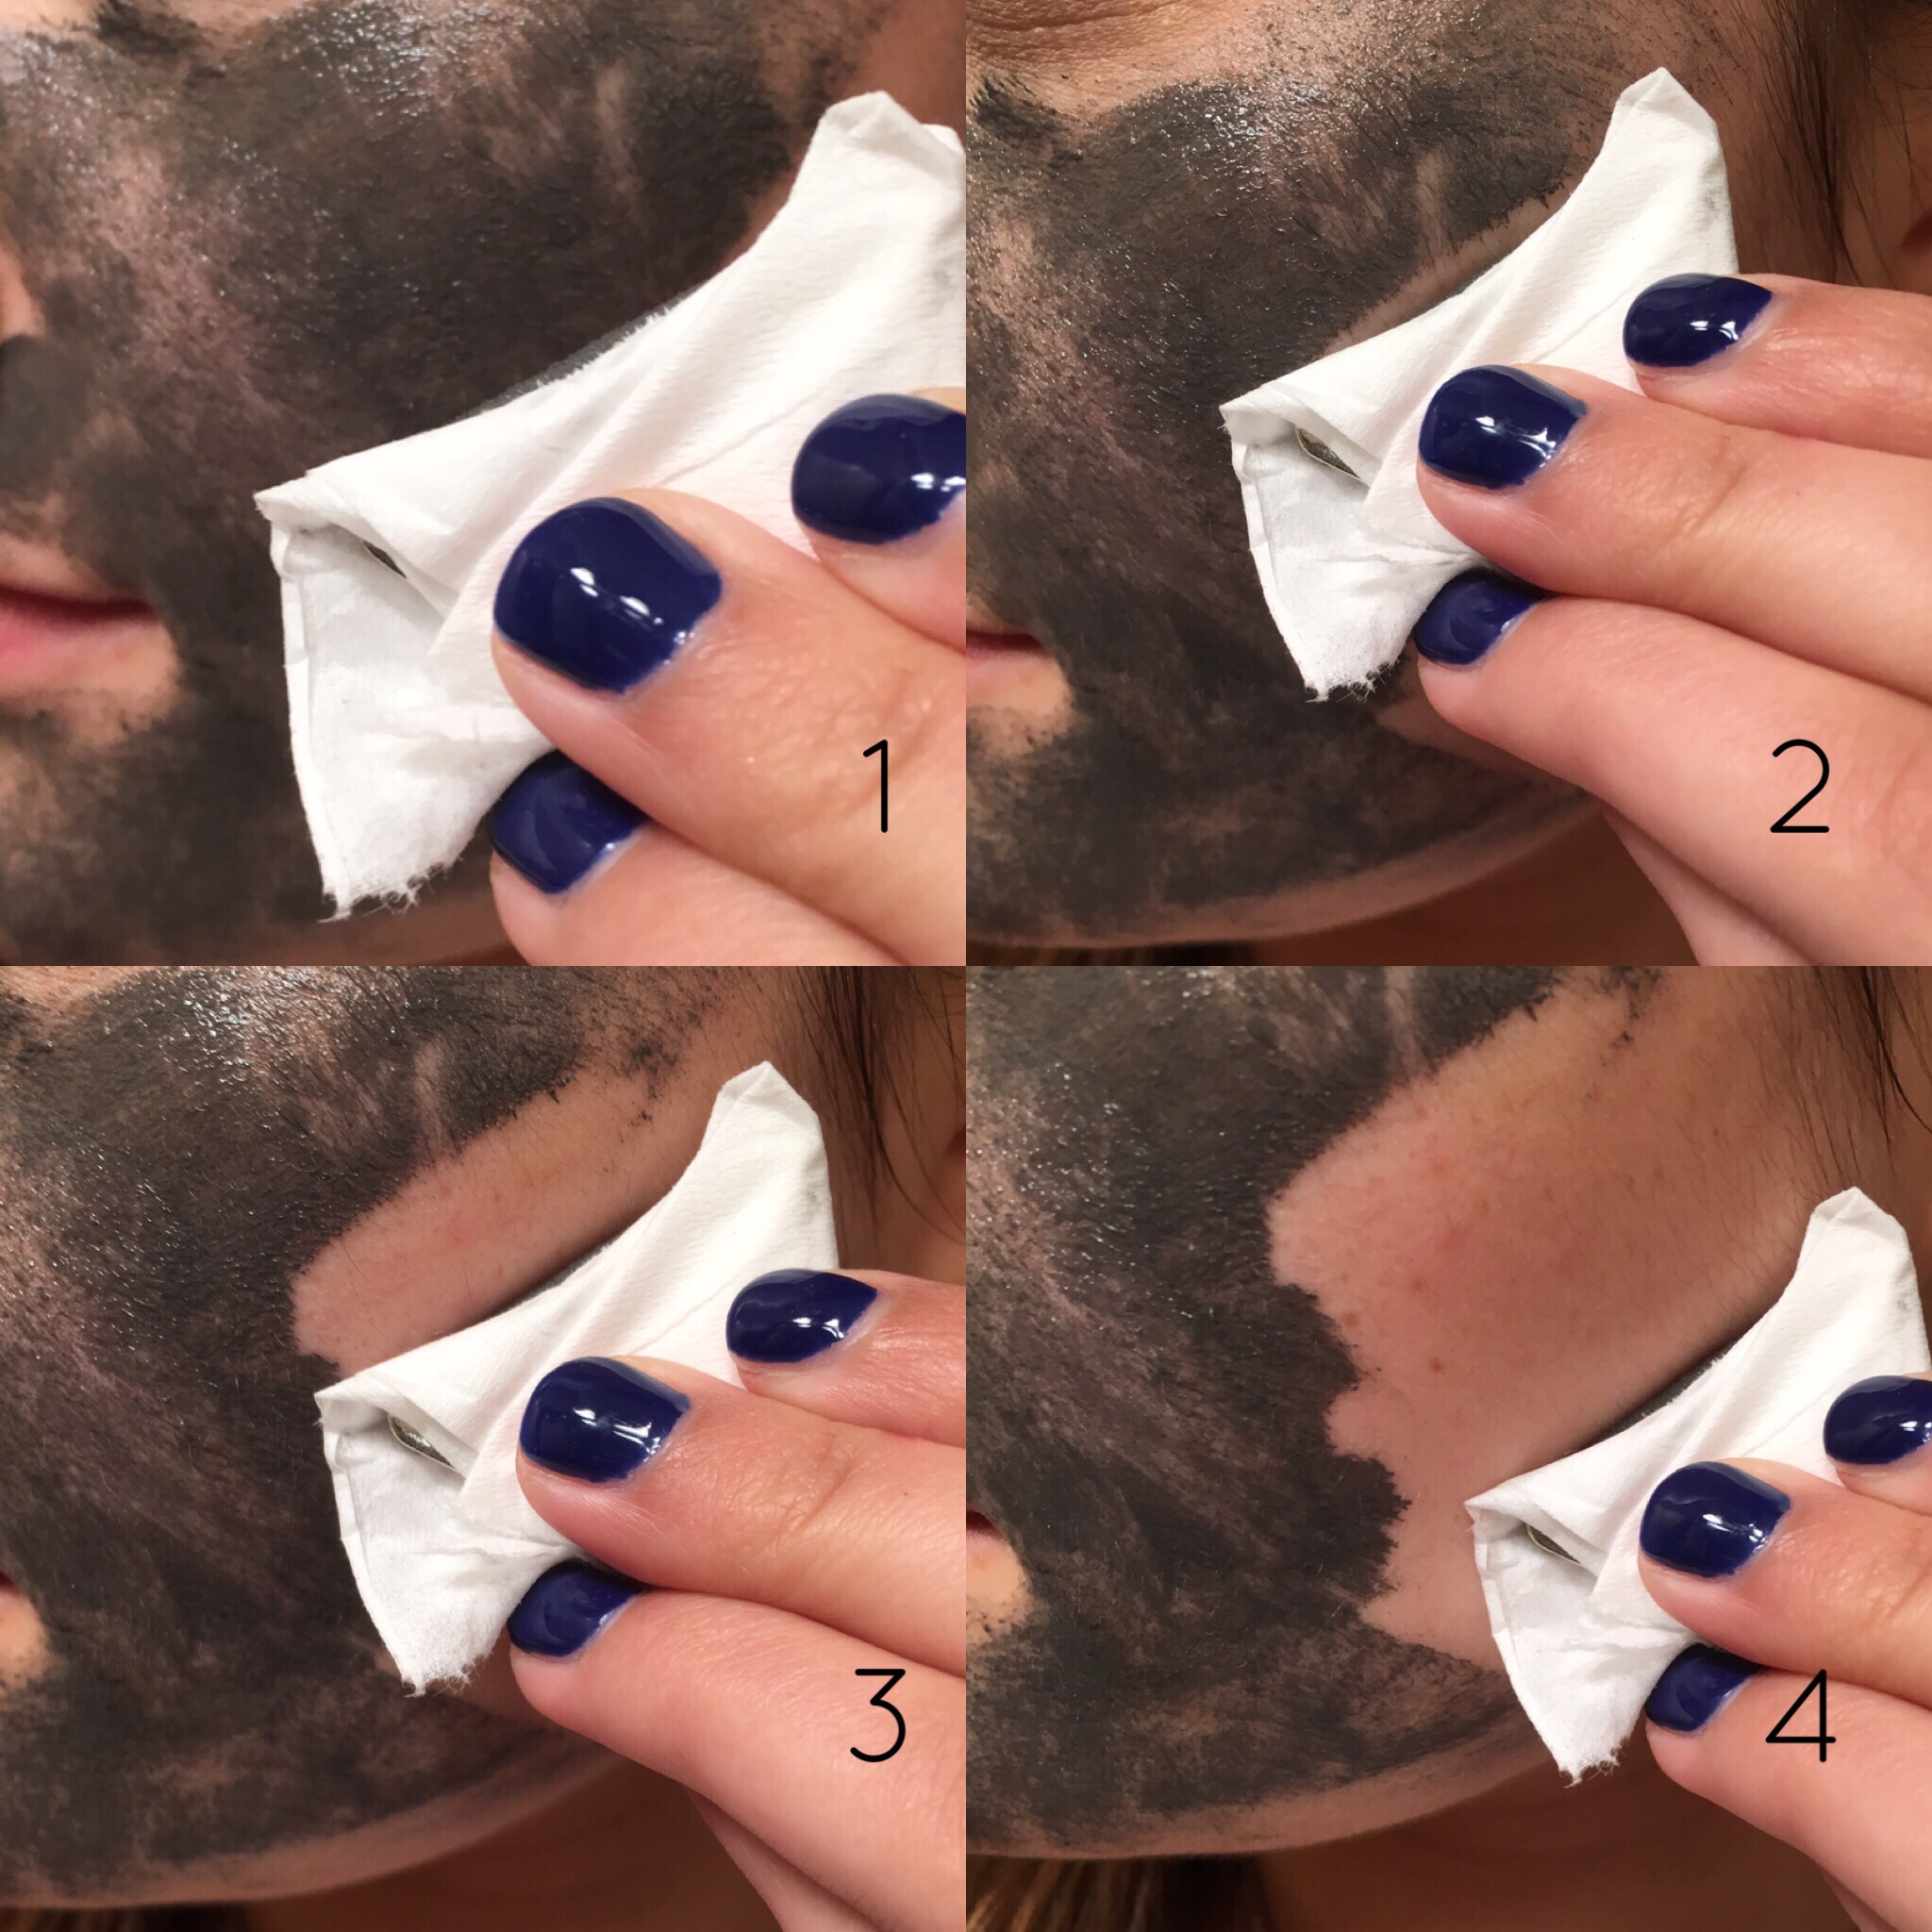
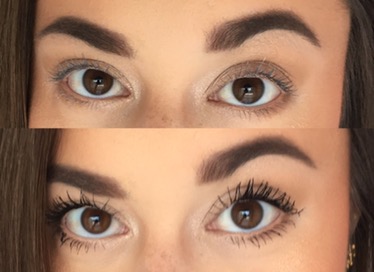
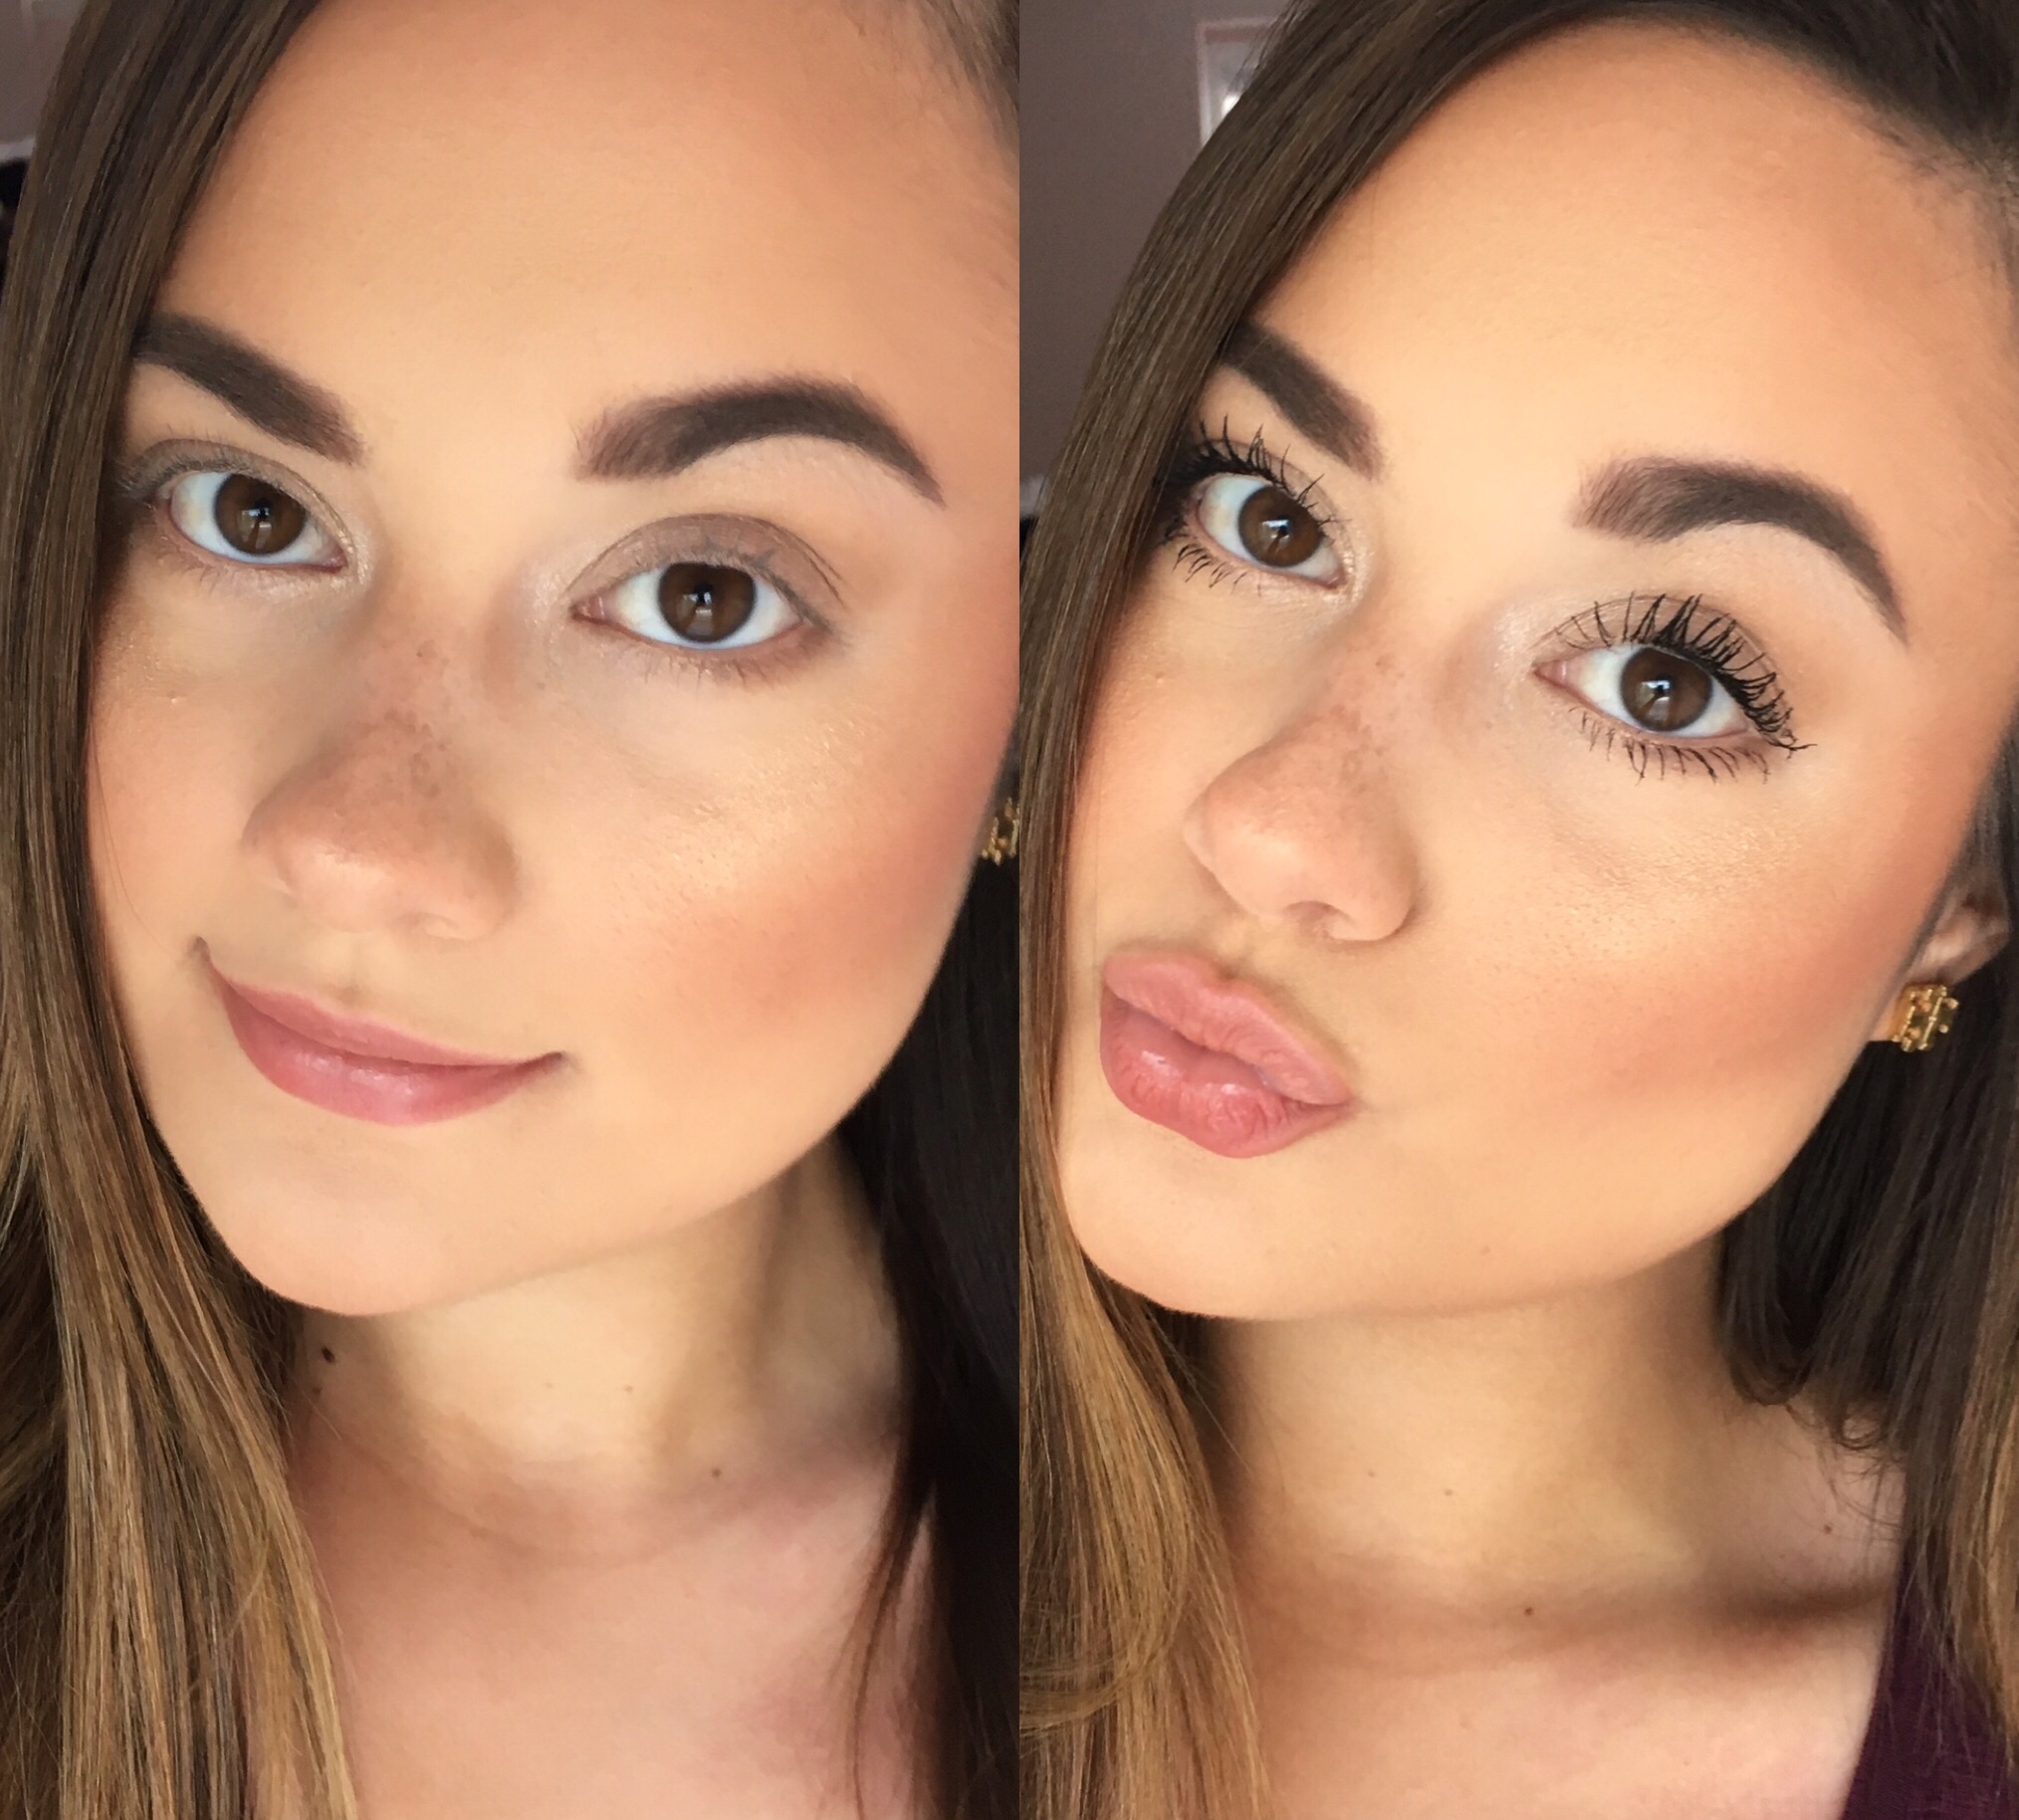
Left side: Liquid eyeshadow only. Right side: Glitter layered on top.

Now it is time for the best part of all; GLITTER! I sprayed a flat shader brush with some M.A.C Fix Plus Spray to give the loose glitter something to stick to and act as a mixing medium. Then I applied directly to my eyelids, making sure to not get glitter into the crease and only stick to the lid. I kept my eye closed for about 30 seconds to help it dry and prevent the glitter from transferring onto my brow bone area. I immediately noticed how finely milled the glitter is, making it comfortable and not scratchy-feeling on the eyes. As you can see in the photo, it layers beautifully onto the liquid shadow, giving you a richly pigmented and metallic look! 


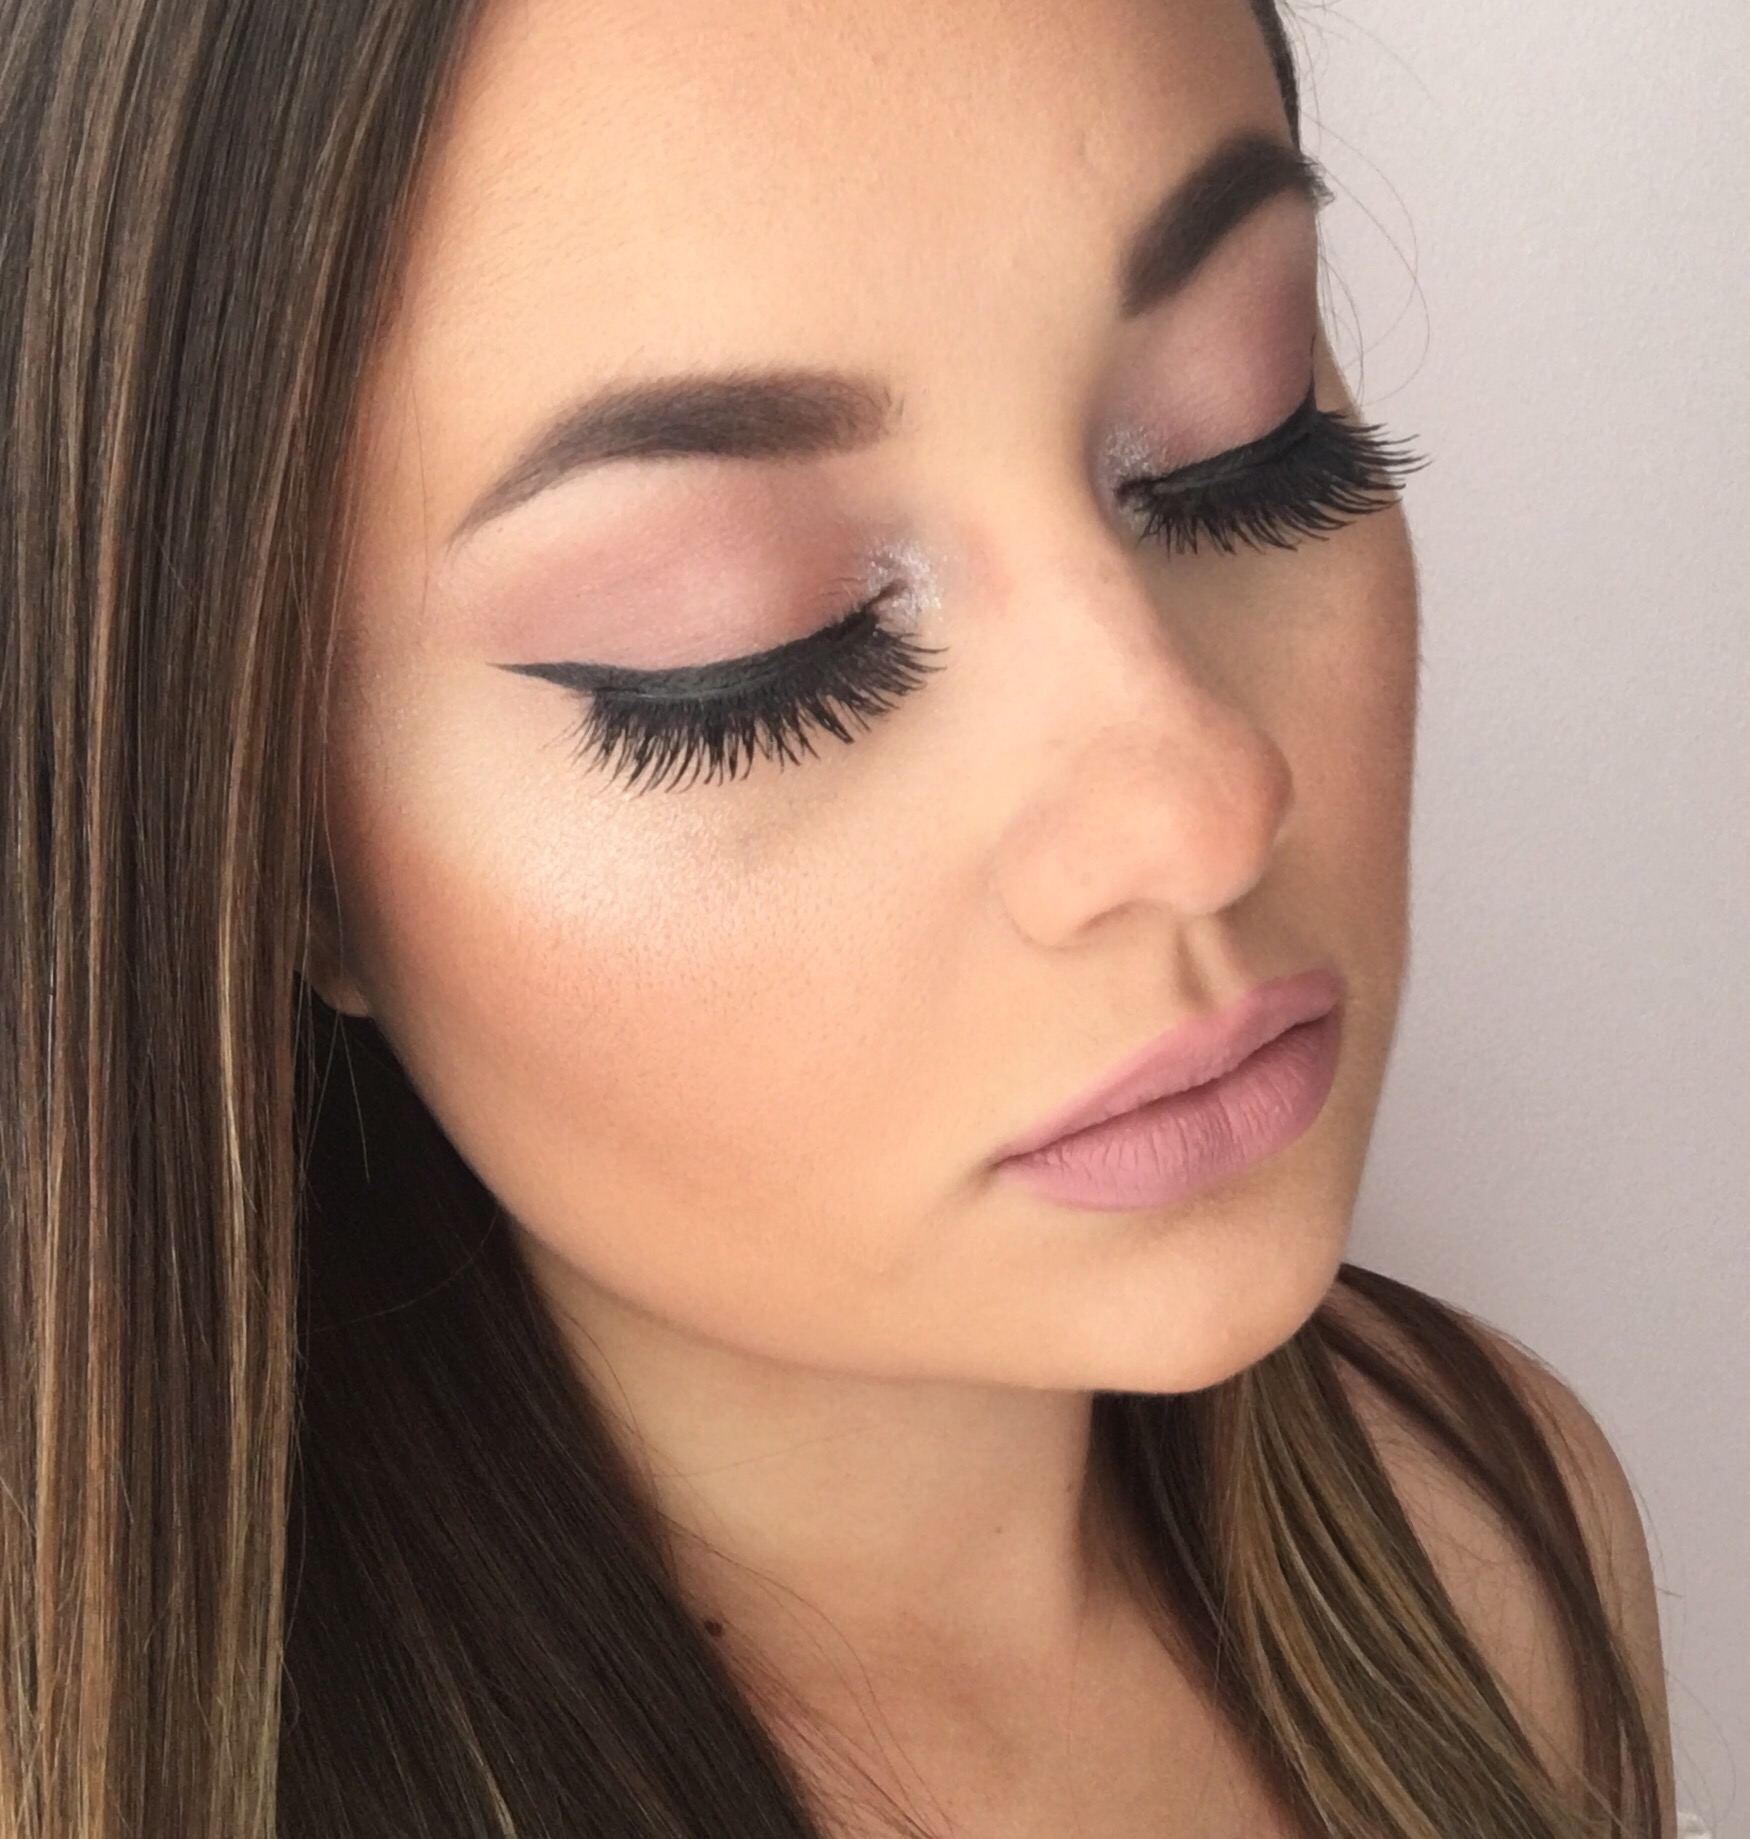
I wore this makeup look for 10 hours and was pleasantly surprised at how well both the liquid and glitter eye shadow lasted throughout the day. I will say that there was little fallout from some sparkles coming loose and transferring onto my brow bone and cheek bones. Nothing too intense though and certainly not a deterrent from purchasing this product. I was also very happy that this eyeshadow did not irritate my eyelids at all! I read that it is formulated without Parabens, Sulfates or Phthalates, which is always wonderful to discover! 


The “Touch In Sol Metallist Liquid Foil & Glitter Eye Shadow Duo” is totally worth it if you are a glitter lover like me! At $25, I would say it’s fairly priced because it’s double ended and a high quality formula! There are 5 shades in the range, so you’re bound to find a color that suits your preference best! What other new products have your eye this holiday season? Let me know! 

Tarte “Amazonian Clay Blush Palette Color Wheel” Review and Swatches!


With the holiday season quickly approaching, all of our favorite beauty brands are releasing their limited-edition sets! I love shopping on Sephora because they show you the price of the product (duh) and they also show you the value of the set, so you can see how much money you’re saving! This usually sways me one way or another when deciding which sets to buy and which ones to pass up on. I discovered the Tarte “Amazonian Clay Blush Palette Color Wheel” on the super addicting “Just Added” section on Sephora’s website. It was a $150 dollar value and I paid $44 for 8 blushes and 2 highlights! I feel like that’s a great deal since Tarte blushes are my absolute favorite formula (they last forever on the cheeks) and I really liked the variety of both cool and warm toned shades! I have owned other Tarte seasonal blush palettes in the past and was very pleased to discover that their permanent blush shade’s formula is what is used in their limited edition sets.       


The packaging on this product is absolutely stunning and very high quality! I love the fun, purple swirls on the front of the palette. It’s very sturdy and not light in weight, so I think this would be amazing for travel! The blushes range from matte and luster finishes and it comes with two beautiful pearlescent highlighters. The palette is split into two with 5 warm shades and 5 cool toned shades. There is also a plastic divider between both sections to prevent your blush pans from transferring onto one another! 


Let’s begin with the warm toned side, which of course is my favorite! The first shade is a highlighter named, “Idol” and it can be described as a golden-bronze shimmer. The formula is very smooth and it applies very evenly and glossy on the cheekbones! I feel like this particular shade will go with medium and darker skin-tones beautifully since it has that gorgeous golden undertone! Next is the blush in the shade, “Culture” and it is a very pretty, peach shade with golden shimmer. I already know this is going to be one of my favorite blushes in the palette! The next color, “Surreal” is a violet-based pink shade that has a neon vibe to it! The shade “Deco” is also very neon and bright, but is a coral color with an orange undertone! This type of shade is awesome to provide an energized, awake look to your skin when you’re running late to work and need a quick, fresh makeup look! Lastly, “Mod” is a very muted, nude-peach shade that has a rose undertone. I feel like this color is going to be perfect for fall makeup looks! 


“Crafty” is a champagne highlight with slight silver reflects. It is very cool toned, but unfortunately does not apply as smoothly as the other highlight in the palette. I find this color looks better as an inner-corner eye highlight shade, rather than on top of the cheekbones. It isn’t a total fail, just not my absolute favorite. The blush called, “Montage” is a plum-berry shade that is really bright, yet wearable. “Ironic” is a brick-red, rosy shade that is actually pretty warm toned. Next is, “Icon” and I would describe it as a rosy-peach-pink color that is very cool toned. I think this will look beautiful during the winter months and will go with so many makeup looks! The last color, “Concept” is a nude shade with a cool, mauve undertone. I feel like this will be another favorite of mine because it’s very wearable and can go with any makeup look! 


As you can see, you get so much variety in this palette and it’s definitely a good value for only $44! This is perfect if you’re looking to invest in a good quality blush palette with lots of different shades! I’m really happy they included a couple highlighters as well. These blushes last 14+ hours on my skin, so I never have to worry about fading! They are also formulated without parabens, so thank you Tarte for caring about the ingredients in your products! I would highly recommend this product if you love blush and enjoy changing it up on a daily basis! I know I’m going to get a lot of use out of this palette, but that’s only because I wear blush every single day! What holiday sets do you have your eye on this season? What would you like to see me review and swatch next? Let me know in the comments! Thank you so much for reading! 

Follow me on Instagram: @abigaillindsayblog

Email any business inquires to:

abigaillindsayblog@gmail.com  

Magnetic Face Mask?!


I recently received the Dr. Brandt MAGNETIGHT Age-Defier Mask as a Sephora free sample and knew I had to document trying it out for the blog! It is described as, “a powerful age-defying facial mask that dramatically transforms the look of your skin by harnessing the power of attraction.” Yes, you read that right, this is a magnetic mask. The formula is created with iron, which helps reduce the signs of stressed, aging skin! It’s good for individuals that suffer from wrinkles/fine lines, elasticity, firmness and uneven texture. Plus, it comes with a triangle magnet that supposedly lifts the mask right off your skin, leaving behind a skin softening oil that has additional skincare ingredients.    


To start this process, I washed my face with soap and water and removed all of my makeup! Then I took the spatula that comes with the mask and spread a thin layer over my clean face, trying to avoid the eye area. As you can see, it doesn’t apply very evenly, but that doesn’t bother me too much! I left it on for about 10 minutes because that was the recommended time! 


Next I took the magnet and wrapped it with a tissue as instructed! It is a surprisingly strong magnet, it’s even advised to not use it if you have a pacemaker or other medical devices/implants! So I smoothed it over my skin and was in shock at how instantly it lifted the mask off my face! It made a clean line of removal and did not smear or move around. I was so impressed with this process, I rushed over the rest of my face, waiting for it to not work, but it removed the entire thing all on the same magnet! 


Once I was finished taking it off, I realized that it left an oily feeling on my face! Reading the directions, it said that you are supposed to massage the remainder in and use it as a skin treatment! So I decided to do that and continued with the rest of my nighttime skincare routine. Overall, I really liked using this mask! I think the process is so much fun and really easy to do! I definitely didn’t see immediate, extremely noticeable results, but that isn’t a total deal breaker for me! My skin felt hydrated and my pores looked smaller, I just didn’t see a huge difference as far as fine lines, but perhaps that happens over time! This is a pretty expensive mask, $75 for the full size, so I’m not sure if I would purchase that, just because I’m not wowed by this product just yet! It was super enjoyable and cool to see, so I would recommend getting your hands on a sample size if you can! Thanks for reading! 

Romantic Mauve Makeup Look

Mauve and blush tones are very on-trend this year and seem to be popping up all over various Instagram makeup accounts. I feel like these rose-toned shadows look super natural, without being the same-old browns and gold tones I usually stick to. This makeup look would pair well with your standard neutral shades, like gray, cream and black, but I think it would look gorgeous with a blush-toned ensemble for a monochromatic, trendy vibe. I used the Naked 3 palette to complete the eye look and I loved the way it turned out. I re-discovered my love for these eye shadows and would highly recommend this palette if you love mauve-toned makeup looks.


  1. I started off by priming my eye lids with my new favorite Wet N’ Wild Eyelid primer and then sweeping the color “Strange” from lash line to brow bone. I love using a matte, light color to set my primer and allow the other shades I place on top blend easier.  
  2. Next, I blended “Limit” throughout my crease as a transitional color.
  3. Taking the matte shade, “Nooner,” I deepened my outer crease. I love doing this gradient effect to make my eyes appear larger and more defined.
  4. I used a combination of “Burnout” and “Liar” for my lid shade. I made sure to pack on this color with a flat shader brush to decrease the likelihood of glitter fallout!  
  5. I used ColourPop’s “Tassel” on my inner corner to provide an intense highlight effect and further widen the look of my eyes. I loved the pop of sparkle that this step added to the overall look!
  6. Lastly, I lined my upper lash line using the Stila “Stay All Day” felt tip eyeliner pen and used the Tarte “Tartiest” mascara to prep my eyelashes for falsies.


I used the shades “Bubbly” and “Dripping In Gold” from the Anastasia “That Glow” Glow Kit for my highlight! I love the glossy look of this product when applied to my cheekbones, which is rare to find in a powder formula! For the lips, I used ColourPop Ultra-Matte Liquid Lipstick in the shade, “Midi,” which is a cool-toned, dusty pink shade that compliments the eyes really well. I would definitely recommend wearing a chapstick or lip primer underneath these lippies because they’re very drying and borderline chalky otherwise! The only aspect of this look that I wasn’t too fond of was the lashes…not only were they extremely uncomfortable, they would not adhere to my natural lash line! They were the Ardell “Double Up” Wispies, but I wanted to mention the Ardell “Demi Wispies Natural” are my favorite lashes and are so light to wear! I tried two different lash glues with the “Double Up” style and neither of them would help this thick band stay in place on my eyes, which resulted in covering the band with lots of gel eyeliner and trying to make it work! They look beautiful when your eyes are open, but unfortunately it is pretty visible and not cute whenever you close them.


Let me know if you enjoy these simple makeup looks and would like for me to do more! I know it would be much easier to film a tutorial from beginning to end, rather than meticulously explain each detail of the process, so let me know if you would be interested in seeing that instead! Thank you so much for reading!


Follow me on Instagram: @abigaillindsayblog

Email any business inquires to:

abigaillindsayblog@gmail.com  

Are Lash Primers Really Worth it?

If you know me, you know my holy grail makeup item is mascara. I feel like the effect of long and volumized lashes makes the biggest impact on my overall appearance! Without mascara, I feel like my eyes look super tiny and sleepy, which I of course want to avoid. I have been interested in trying a white eyelash primer for a long time now, but I never really saw the purpose in using one since my lashes are pretty long as it is. Plus, I typically use two mascaras (one for volumizing and one for lengthening) so I never really found it necessary to search for another method to achieve eyelash goals. However, when I was browsing some of the top rated products at Sephora and came across the, “Lancôme CILS BOOSTER XL Super-Enhancing Mascara Base,” I decided to try it for myself to really see what the hype was about.

Lancome, CILS BOOSTER XL Super-Enhancing Mascara Base, $25.50


It is described on Sephora’s website as,”A lash-conditioning, mascara primer in the same great formula and new packaging that conditions and primes lashes to maximize results—creating even longer and more volumized lashes.” Reading that description honestly gave me emoji heart eyes because I would love bigger lashes, but would especially benefit from having a conditioning treatment while wearing this product. My eyelashes are constantly falling out and I do worry if it’s because I’m not conditioning them properly after wearing mascara every day. 


This formula is infused with micro-fibers and Vitamin E, which is why you achieve so much extra length and volume before adding your standard black mascara over top! I really noticed that my eyelashes looked thick and much longer with just one coat of the white mascara base. Once I applied my traditional mascara over top, it did go on a little more patchy than it does without a primer. I have a feeling it’s because my natural lashes are brown, so I’m not able to see the gaps that easily, but with a white base, you can really tell the exact places your mascara isn’t coating. With that said, once the black color is built to your desired intensity, it does stand out really well from being applied on the white base, which was a pleasant surprise I never saw coming! Yay!


I wish I could answer my the title of this post and tell you whether this was worth it or not, but I honestly don’t know?! I can’t make up my mind on whether or not I need this product in my life, or if it’s just an extra step that prolongs my getting ready process. Ugh, these are real problems people! I guess I would say that no, you definitely don’t NEED this, but what makeup product does one even “need” anyways? If you have short or sparse lashes and you can’t find a mascara to give you the full effect you’re looking for, then yes, totally get this Lancome mascara base because it will make a difference and I definitely think you’ll enjoy the results! For me personally, I’ll continue using it, but I don’t know if I’ll repurchase! I love the way my lashes look once the process is complete and I really enjoy how much longer my mascara stays dark and vibrant by using a primer! However, it does take awhile to apply the base, then go in with my mascara and make sure all of the white is covered up! If you’ve been on the fence about trying an eyelash primer, then I would definitely recommend giving this one a shot because it really does work great! I also wanted to mention that I used my Sephora Collection “LashCraft” black mascara along with the Lancome mascara base and that combination worked really well for me! I mentioned that mascara in my recent August favorites, so definitely check out that post for a separate review on that product! 


Thank you so much for reading this post! Let me know your thoughts on eyelash primers/mascara bases! I want to know the best strategies on applying as well, so if you have any tips or tricks, please let me know! 

Follow me on Instagram: @abigaillindsayblog

Email any business inquires to:

abigaillindsayblog@gmail.com