Concealers Worth Your Money, Honey! | Part II

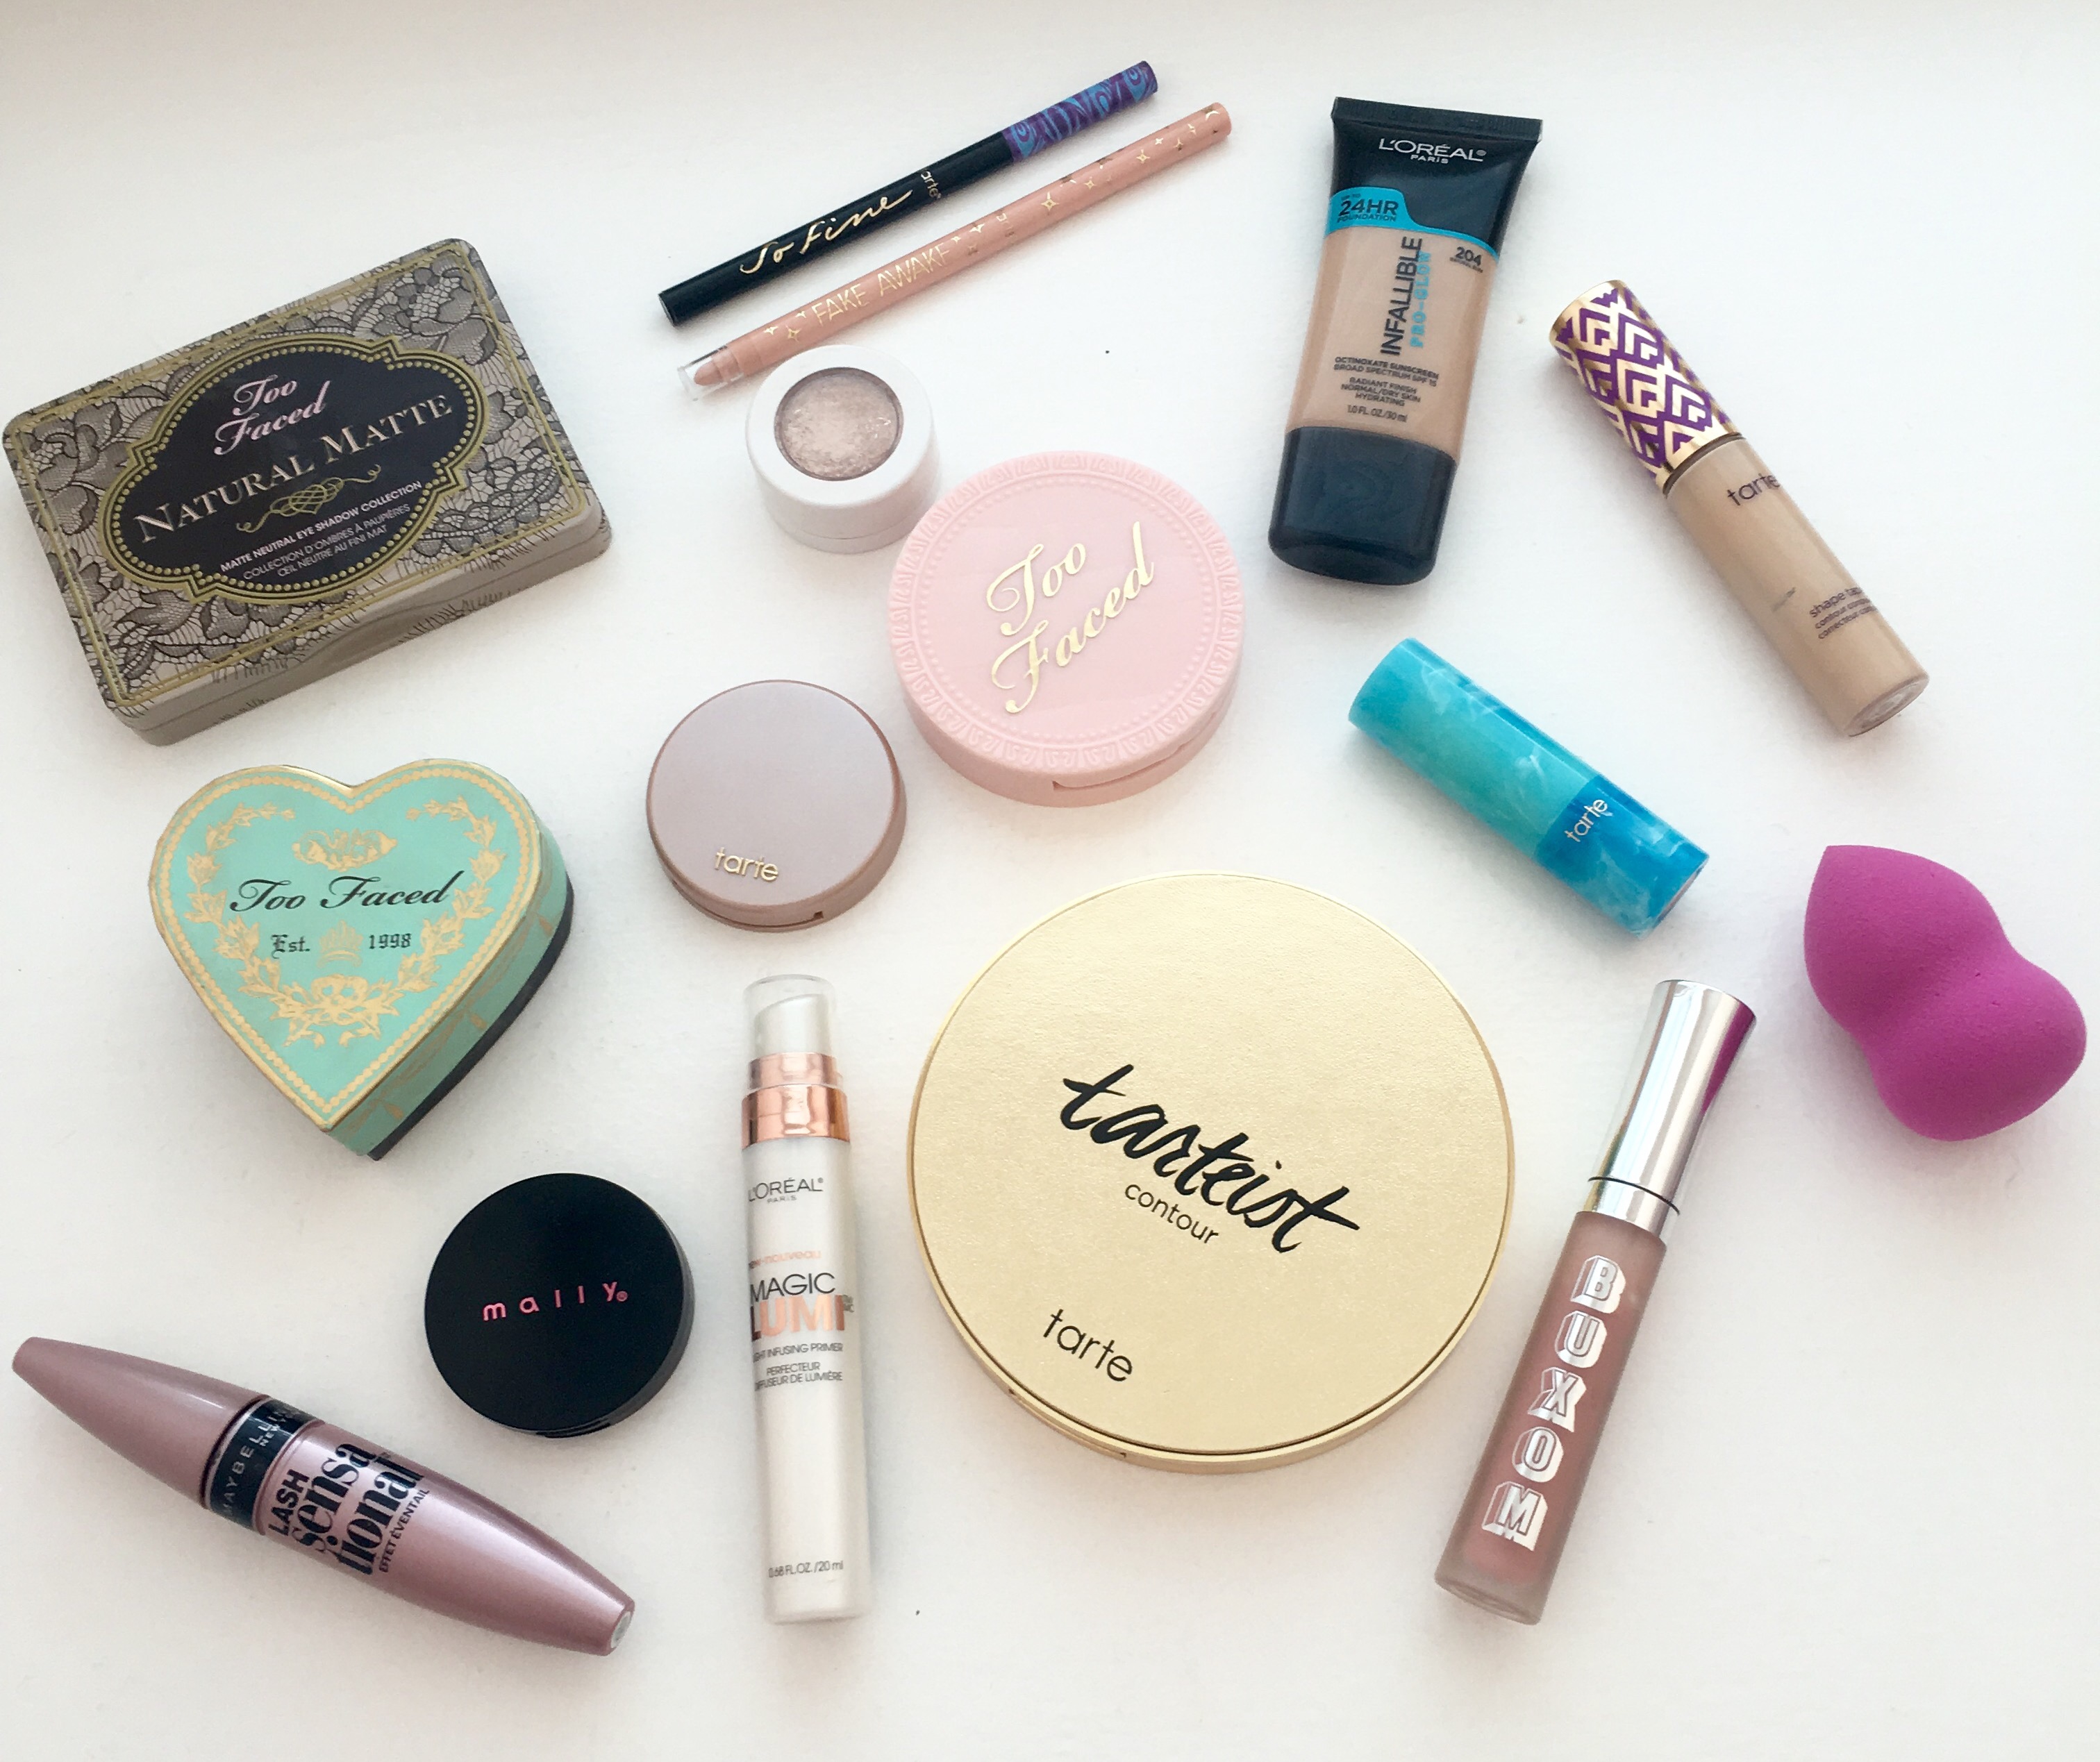
One of my most viewed blog posts is my “Concealers Worth Your Money, Honey!” post from October 23rd, 2016! I thought it was time for an update and to my surprise, only one of the concealers mentioned in that previous post has remained a present day fav! If I had to guess, this subject has such popularity because of how common dark circles are for all of us! Whether you have them because they’re hereditary, or you’re a new Mom, an overworked employee, whatever the circumstances may be…we all seem to struggle with being tired and/or having discoloration in our under eyes. I wanted to include different brands, price points, formulations, etc. to fit the needs of the variety of skin types/concerns of my readers. Just to give you some background information about me. I am always tired due to a new job with a very demanding work schedule. I also have dark, blue-black circles underneath my eyes from genetics. Plus, I have seasonal allergies which play a big role in the puffiness and swelling that I experience this time of year. Safe to say, I have less-than-perfect under eyes and personally NEED to wear concealer in order to feel comfortable. It’s a step I never skip, whether I’m going for a natural, “no makeup makeup” look or a full glam beat! There is never a time (unless I’m physically ill or in a state of emergency) that I’ll pass on concealer. Since I do have this great need, I’ve tested a lot of different formulas from many different brands and have narrowed down my list to 5.

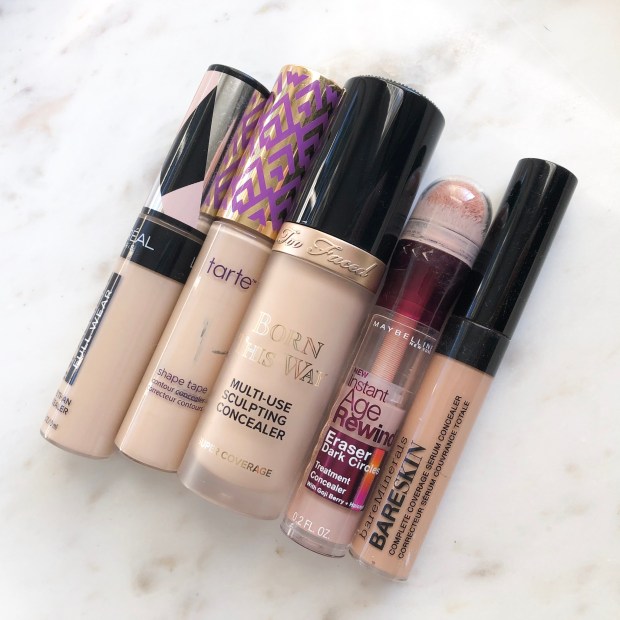
L’Oréal Infallible Full Wear Waterproof Concealer | $13.49

I stumbled upon this product when I was trying to find a more affordable dupe for the Tarte Shape Tape Concealer. After reading reviews and testing swatches in store, this one seemed to be the closest match on the claims and coverage from Tarte Shape Tape. This is a very full coverage product that dries to a matte finish. I would definitely recommend applying this with a damp beauty blender to thin out the formula. I really like the large doe foot applicator because it covers such a wide area very quickly! It claims to be water resistant and all day wear, but I’ve never really tested it to withstand either of those conditions. I can tell you that it for about 14-15 hours on me and didn’t fade. I really like the versatility of this concealer because I can use it to cover up imperfections, such as blemishes and dark spots, and also use it underneath my eyes!

Tarte Double Duty Beauty Shape Tape Contour Concealer | $27.00

If I could only recommend one concealer to you, it would definitely be this one! I’ve used it for years and it’s just so consistently amazing. Not only is it very full coverage, but it is also lightweight and very blendable! Warning: this can get cakey and look dry if you 1. Apply too much (all you need is a small swipe of product underneath each eye) or 2. You blend it out with a brush. I’ve found that using a damp beauty blender is key to sheering out this concealer and making it look more skin like and natural, without taking away from any of the coverage it provides. It also will not settle into your fine lines, exaggerate pores, or cling to dry patches. I think it’s also very important to mention that this is formulated without Parabens, Mineral Oil, Phthalates, Triclosan, Sodium Lauryl Sulfate, and Gluten. It’s also Vegan and Cruelty-Free! I have 2 of these in my collection at the moment. One is in the shade “Light Neutral” which is about 1-2 shades lighter than my skin. It’s definitely personal preference, but I’ve found that buying a concealer that is a shade lighter than my foundation, really helps brighten up my under eyes. I also use the shade “Light Medium Sand” to conceal blemishes, which I want to match the color of my foundation and provide extra coverage for redness and inflamed looking skin.

Too Faced Born This Way Super Coverage Multi-Use Sculpting Concealer | $29.00

If you have dry under eye skin, combined with dark circles, then I would highly recommend this Too Faced concealer to you! The formula is infused with coconut water, alpine rose, and hyaluronic acid which keeps your skin plump and refreshed throughout the day! I’ve noticed that this product is a lot thinner than the previous two I’ve mentioned, however it still has high coverage and will conceal darkness and discoloration. It has a very lightweight feeling once applied and blends effortlessly into foundation. I’ve actually found that it pairs so perfectly with the Born This Way foundation from Too Faced! I know this product works really well on mature skin because it is so nourishing and won’t settle into fine lines. You definitely have to set this! I would use a really finely milled translucent setting powder on a tapered brush and just tap tap tap out the creases! I find that all hydrating concealers require setting powder to last all day. I use this in the shade “Snow” which is one of their lightest colors. It does oxidize (turn a shade darker) after it’s applied, so be warned of that as well. I would test some in store on the back of your hand, walk around for a bit, then check back to see if the color has darkened since first applied. That’s how I had to select my perfect brightening color!

Maybelline Instant Age Rewind Eraser Dark Circle Treatment Concealer | $9.99

Okay I HAD to include this because I don’t use it alone, but rather in conjunction with all of these other concealers to brighten the darkness first, and then cover it with a shade of concealer that is closer to my skin tone on top. The “Brightener” shade is a peachy pink, color correcting product that is going to counteract the blue/black tones of your under eyes. It instantly gives life to sallow, sunken areas that need an extra boost! I’ve found that I use less concealer when I first apply this, which ensures that I never look cakey around my eye area. It’s seriously so good! I really love the shade “Neutralizer” as well. These are such a great affordable concealer that I seem to always have in my collection. Such a staple!

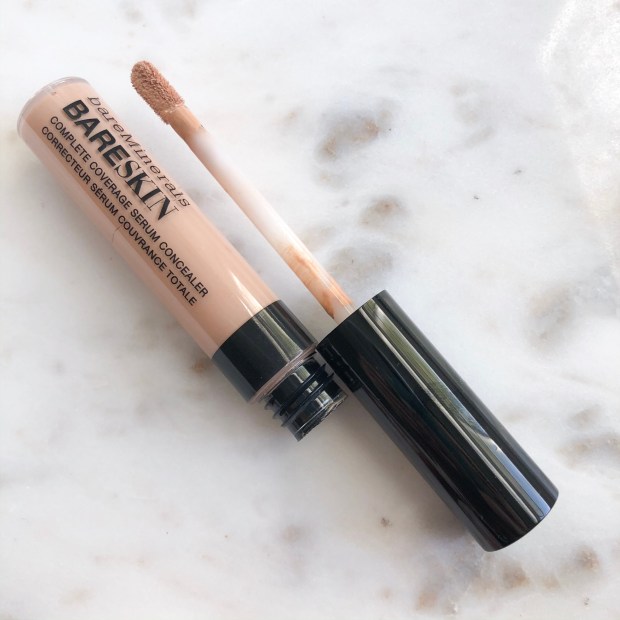
bareMinerals bareSkin Complete Coverage Serum Concealer | $22.00

If you really don’t have bad dark circles, but mainly just want to brighten and hydrate your under eyes, then this is going to be your bestie! This has such a silky, smooth texture and glides evenly over the skin. I love the way this feels on my skin. It is definitely not the most full coverage, but it does cover and will last for 8 hours (sometimes more) without fading! The way I apply this is by creating the standard diamond shape underneath my eyes, then letting the product sit there for about a minute. Then once I feel like it’s started to set, I will blend it out with my damp beauty blender. I’ve found that this method works best if you want to get the maximum amount of coverage from this concealer. As always, I think it’s really important to know that this formula is Paraben-Free, Phthalate-Free, Formaldehyde-Free , Chemical Sunscreen-Free, Triclosan-Free, Triclocarbon-Free, Propylene Glycol-Free. Mineral Oil-Free, Coal Tar-Free, Microbead-Free, and Cruelty-Free. If you get this concealer, I guarantee that your eyes will look more healthy and hydrated!

Whew, that was a lot! If you made it to the end, thank you SO much for sticking it out and reading all 5 of my recommendations. Each of these concealers is so different. I wanted to give you a variety to choose from because I know that we don’t all have the same skin types and concerns! If you know of an incredible concealer that I’m missing out on, then please leave me a comment so I can try it next! Love you!

Follow me on Instagram: @abigaillindsayblog


Email any business inquires to:

abigaillindsayblog@gmail.com  

Soft Spring Makeup Look!

It’s finally Spring and I could not be happier! It’s so refreshing to experience warm weather and I love seeing the sunlight at 6:00 pm! With that said, I’ve been going a little more natural with my makeup just because I want to look really fresh and dewy on a daily basis. I’m sharing an updated everyday makeup routine in case you’re like me and enjoy switching things up based on the seasons! I’m focusing on making my skin as flawless as possible, without looking heavy. Also you can see that I’m choosing natural colors on the eyes, with peach-tones for my blush and lip color!     


The first step in this routine is to apply a luminous primer all over my skin to give me a lit-from-within look. My absolute favorite one is the L’Oreal “Magic Lumi” because it evens out my skin tone and gives me a sheer glow, rather than a glittery or oily effect. Next, I apply my foundation and concealer with a damp beauty sponge, I’ve been loving the new pink one by L’Oreal, but feel free to use whatever you have on hand! I have been obsessed with the L’Oreal “Pro Glow” liquid foundation for giving my skin a luminous, natural finish. If you have oily skin, try their “Pro Matte” version, which is another one of my favorites. The Tarte “Shape Tape” concealer is one of my holy grail makeup products and definitely something you should invest in if you have dark circles! This product will not settle into fine lines and it has awesome, full coverage without ever looking heavy. I place my concealer in an upside down triangle underneath my eyes and I blend some additional dots on the center of my forehead and chin, just to even out the brightness. To keep the glowing look of the skin, but also control my oil, I set my entire face with the Too Faced “Primed and Poreless Pressed Powder.” This is an awesome translucent powder to set your makeup, without adding any additional coverage. Be careful not to add too many layers of this product, or you will end up with the unfortunate white flash back if you are using this powder during photography sessions! I also take the yellow shade from the Tarte “Tarteist” contour palette to set my under eyes and give them an extra layer of brightness! My favorite bronzer to use with this kind of look is the the Too Faced “Sweet Hearts Bronzer” in the shade, “Sweet Tea.” It is a neutral bronze color, so not too orange or too ashy. It has a radiant finish, which looks great in natural lighting! I love a super bright and shimmery highlight for this time of the year, so the Tarte highlight in “Stunner” has been my new obsession! This is by far the longest lasting highlight in my collection, it seriously stays on my cheeks for the entire day without fading! I’m so shocked by the pigmentation and blinding effect is gives my face. In the pan, it looks like it would be too dark for my medium skin tone, but once you apply it, you’ll see that it shows up beautifully! For blush, I used my new favorite Mally blush in the color, “Perfect Peach.” I think this is going to be so gorgeous once I have a deep, olive tan this summer. This is also very long lasting, which is an awesome added bonus! 


For the eyes, I really want to keep it super simple and as neutral as I can! I love my Too Faced “Natural Matte” palette because it’s so easy to create a simple look from the color selection, it’s a no-brainer makeup item. I set my entire eyelid with the shade, “Heaven” to help my other shadows blend effortlessly. I blend “Honey Butter” into the crease to give subtle dimension. I took “Strapless” just on the outer edge to give the look a little extra drama. I also blended this shade on my lower lash line for cohesiveness! My lid shade is the beautiful ColourPop eyeshadow in the shade, “Lovely” and may I just say, I could wear this color every day and be perfectly happy. It’s super pigmented and gives the eyes just enough sparkle! I did black winged liner, per usual and used my Tarte “Rainforest of the Sea So Fine” liner. Feel free to not do eyeliner, or use a brown color to make the eyes appear more natural. I used one of my new favorite drugstore mascaras, the Maybelline “Lash Sensational” is super nice! It really separates and volumizes like a high-end mascara would! For the lips, I used my brand new Tarte “Rainforest of the Sea Color Splash” lipstick in the shade “Sunkissed,” which is probably my new favorite lipstick color and formula! These are so buttery and long lasting, perfect for spring and summer when your lips naturally feel more dry! I topped that off with all-time favorite nude gloss by Buxom in the shade “White Russian” to match the rest of my dewy makeup look! I didn’t include a photo, but I sprayed my entire face with the Urban Decay “All-Nighter” setting spray to lock my face into place and blend all the products with one another! 


Did you enjoy reading this post? Let me know in the comments below! I read and respond to every person and love interacting with you! I want to know your must-have makeup products for Spring 2017! Thank you for reading! 


Follow me on Instagram: @abigaillindsayblog


Email any business inquires to:

abigaillindsayblog@gmail.com  

Bronze Eyes and Terracota Lips

One of my new favorite lipstick shades to wear are these warm, terracotta, burnt-orange colors. I mentioned in my June Favorites that M.A.C “Del Rio” is my latest obsession. I find this product to be especially flattering in the summertime when I have a tan and wear less eye-makeup than usual. One of my favorite ways to look like I put effort into my makeup look is to wear a bold lip color and spend less time focusing on my eyes and face. I love the way this lipstick defines my smile and gives a whitening effect to my teeth, even though it isn’t a blue-based red color. Since I kept the eyes and face super easy, I think this look is totally wearable for work or any daytime occasion as well. Feel free to wear this anywhere you want!


I began the look by priming my eyes with Urban Decay primer potion in “Eden” to extend the wear time and prevent any creasing of my eyeshadow. For this look, I used ColourPop’s “Sunset Blvd” eyeshadow all over the lid and blended up into the crease. This shade is a gorgeous, golden-bronze shade that compliments the warmth in the lipstick shade. I used my Too Faced Chocolate Soleil Bronzer in “Medium” to further define my crease. I used a mixture of “Sunset Blvd” and my bronzer to blend onto my lower lash line too. Next I took the eyeshadow, “Smog” from my Urban Decay Naked Palette and drew a soft winged eyeliner. I like the effect shadow liner gives my eyes whenever I am wearing a bold lip because it defines, while still being subtle and allowing the lips to steal the show. Next, I used my Tarte Inner Rim Brightener eyeliner on my waterline to give myself a “wide-eyed” appearance. The last step on my eyes was just to apply two coats of L’Oreal Telescopic Mascara on my upper and lower lashes.


For my face makeup, I did my usual foundation routine and added highlight, blush and bronzer for additional warmth to compliment this look. I would like to point out that the blush photographed very bright and peach, but was more bronze and subtle in person. I like to keep the face fairly simple when doing a bold lip or eye. I find that when I do intense contouring and bright face colors, it can sometimes distract from the statement lip color and throw off the balance of the look. Let me know if you want to see a blog post of my foundation/concealer routine since the products I am using now have changed in the last month!


Now for the star of the show, the lipstick! I am obsessed with M.A.C lipsticks in general and have not purchased a single shade that I do not like! “Del Rio” is such a unique color and I liked it because I had nothing like it in my collection. I used the Revlon lip liner in “Nude” to outline and define. In my personal opinion, I think using natural colors for lip liner pair better with a bold lip than finding that exact lipstick color in a liner and using them together. Sometimes it can be really harsh and noticeable lining your lips with red and then filling them in with red. Plus, if you make any mistakes or overdraw too crazy, it’s much easier to blend out with a nude shade than a bold one. So after lining and filling in my lips, I applied “Del Rio” all over. This is a satin formula, so it provided a subtle sheen. I personally think the satin formulas are the best from M.A.C because they’re richly pigmented, comfortable to wear and last a long time. This product stayed put through eating and drinking and after hours of wear, it still left a pretty stained effect on my lips. 


I got a lot of compliments on this look because it was minimal makeup, but still appeared that I put effort into getting ready. I think a warm lip shade and a bronzy/gold eye are gorgeous for summer, but equally stunning as we transition into fall. If you want to try the dark lip trend, but are too afraid to wear something intense, I would say this lipstick is a great starting point! It isn’t “dark,” but definitely pigmented and bold, so you’re able to make a statement, without feeling like you’re wearing editorial makeup to the grocery store.

       
Let me know if you enjoy reading about the different looks I’m loving at the moment and the products I use to achieve them! I enjoy sharing artistry, but find it’s not always the easiest to write about technique. I have always been interested in creating YouTube tutorials, so if you think I should do that, let me know too! Thank you so much for reading 🙂